Here’s How:
Step 1 - Login to the Ameriflex Client Portal.
Step 2 - Select the General tab.
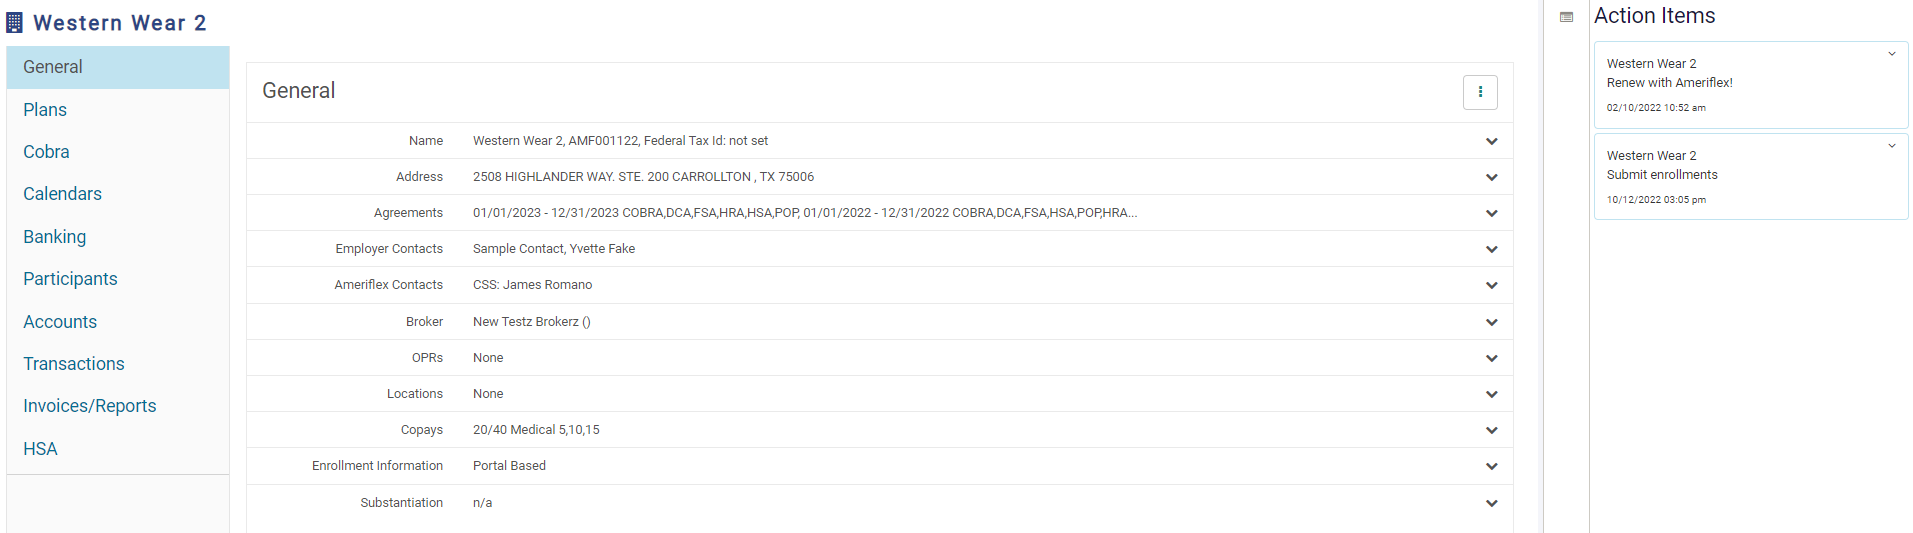
Step 3 - On the General tab, click on the dropdown arrow for Enrollment Information.

Step 4 - Select Portal Based from the available enrollment options.
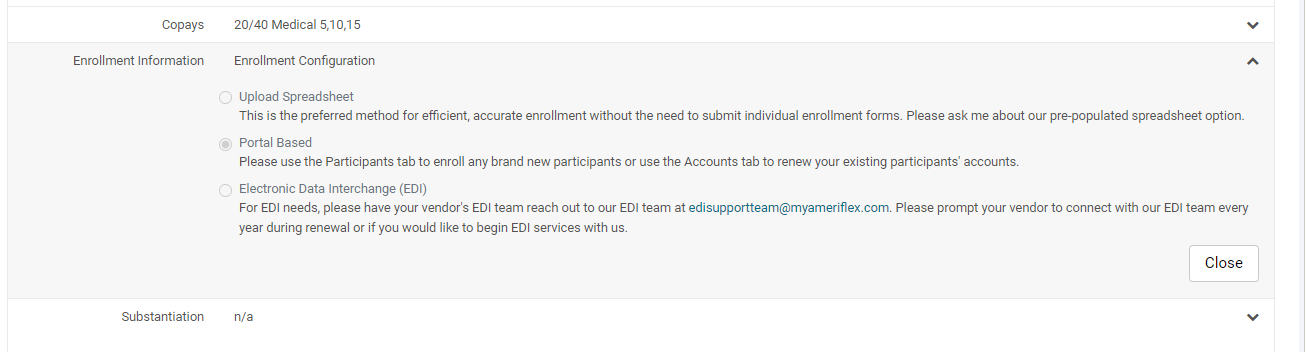
Step 5 - Select Save.
TIP: Once you submit your plan configuration, please allow 24-48 hours before processing enrollments so Ameriflex can perform our internal Q&A on the plan setup. Once Ameriflex has reviewed and approved the plan configuration, you will see the Submit Enrollment Action Item populate on your right-hand menu upon logging in.
Now, you are ready to load your enrollments.
Here’s How:
Step 1 - Select the Accounts tab in the Employer Portal.
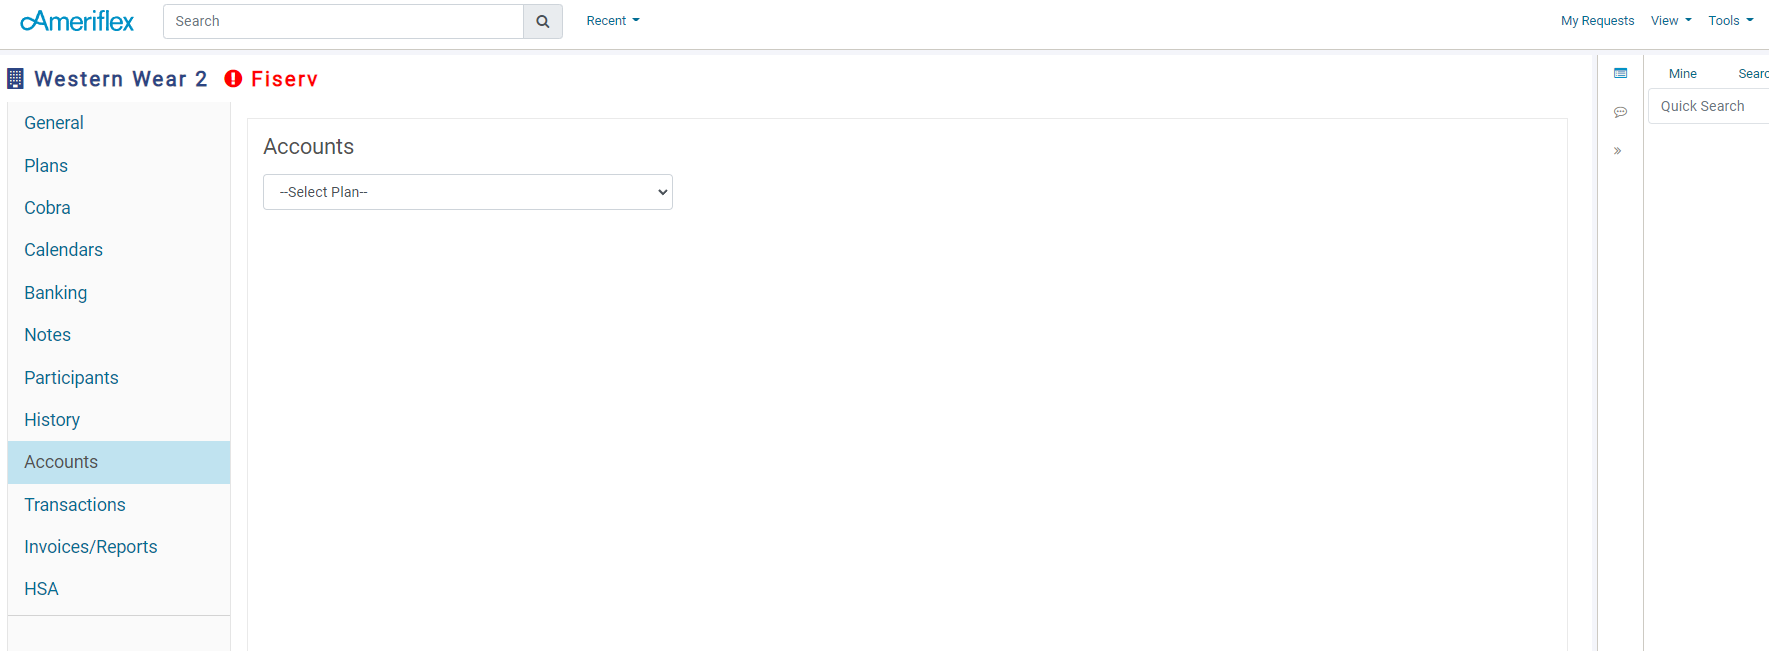
Step 2 - Select the plan you are renewing from the dropdown, for example FSA, DCA, etc.
Step 3 - Select to either enter the Per Pay or the Annual Election and allow the system to calculate based on the calendar.

Step 4 - Update the elections for the new year in the appropriate box. In this example, since Annual Election is selected, we will update the EE Election column, and the Per Pay will be calculated automatically. For each member, ensure the calendar, First Payroll Date, and Effective Dates are correct or update them as needed.
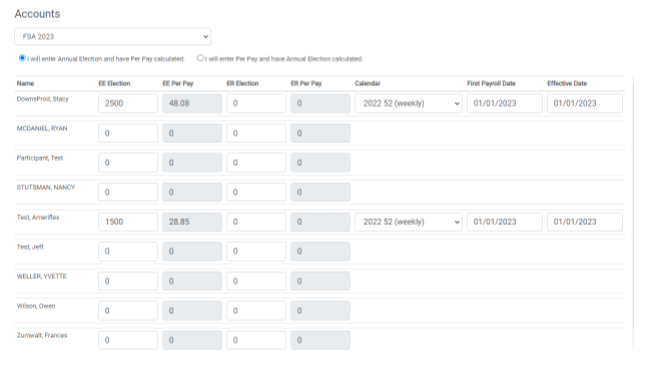
Step 5 - Once completed, select Save, and you will receive confirmation at the bottom of the screen that the elections were processed.
Step 6 - Once completed, select Action Items on the right-hand side, and mark the Action Item for Submit Enrollments as Done.

After completing all the steps, this process is complete, and the elections are live.
NOTE: Be sure to repeat the above steps for all plan types.
- If you find there are individuals listed that need to be terminated, please follow these steps.
- If you have new hires to add, you can add them following this process.
- If you need to make updates to member accounts, please follow these steps.
RELATED ARTICLES:
Updating a Participant's Demographics