Complete the following steps in each section for each action item to complete your renewal:
Order Form and Terms & Conditions
1. Use your credentials to log into the Employer portal.
2. On your home page, your order form will appear. You will also notice a yellow guidance panel at the top of your screen with instructions and additional information to help you complete this step.
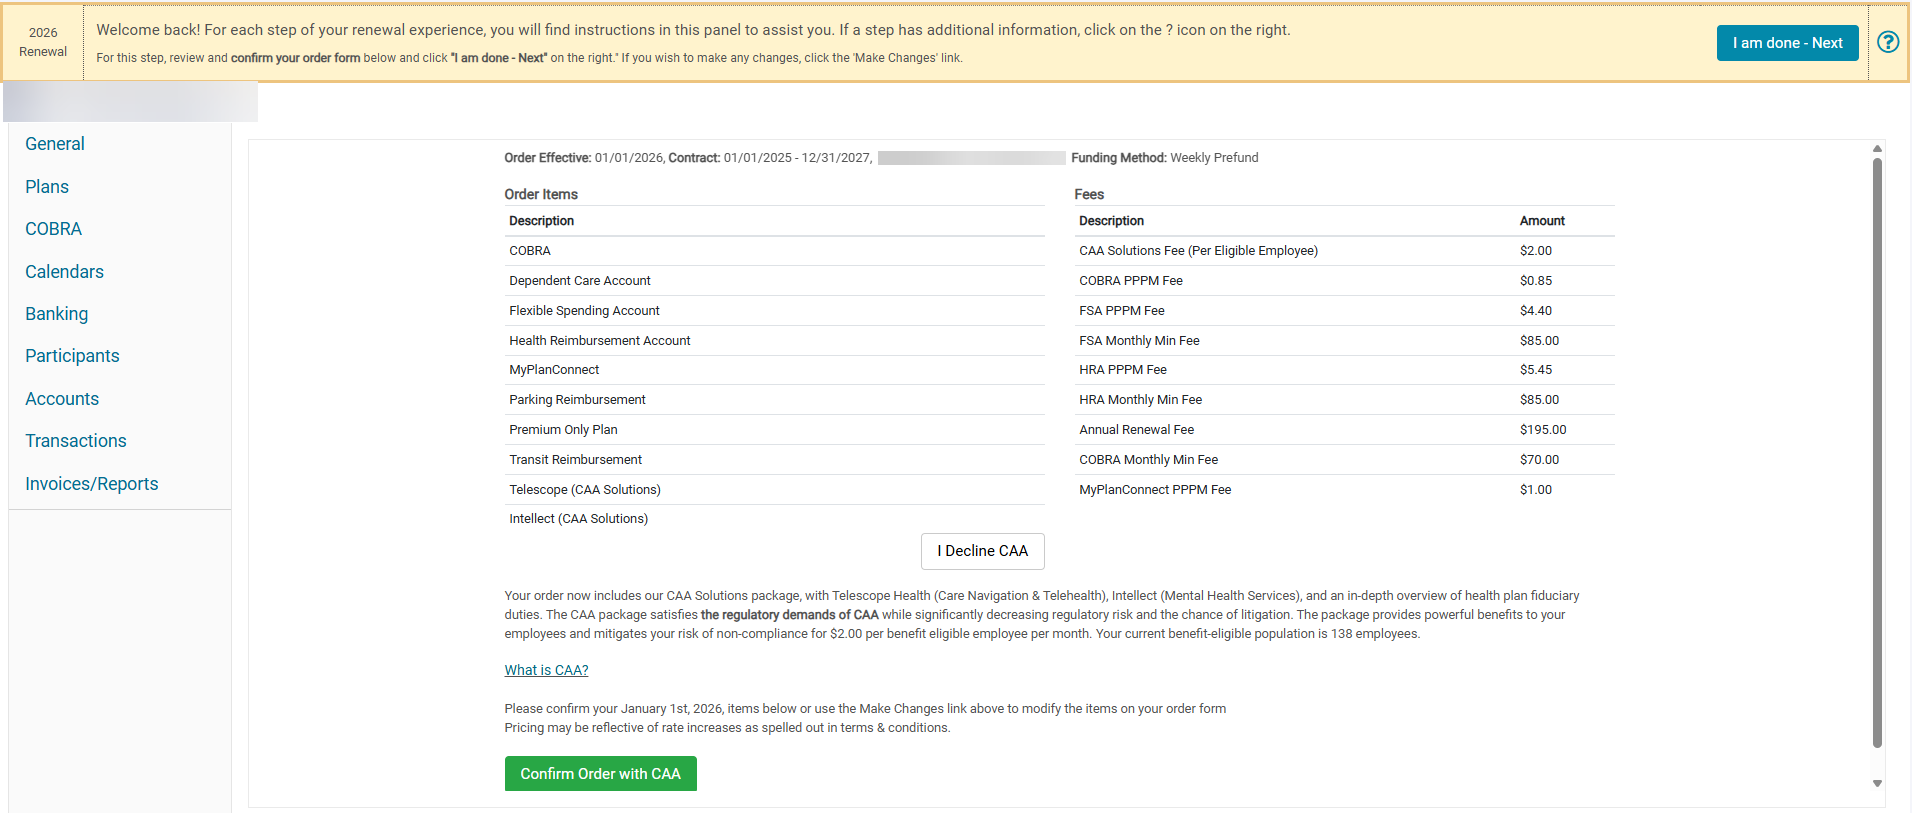
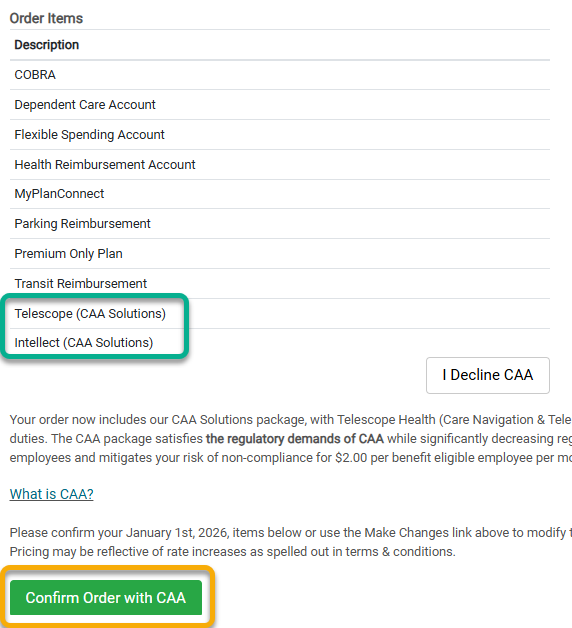
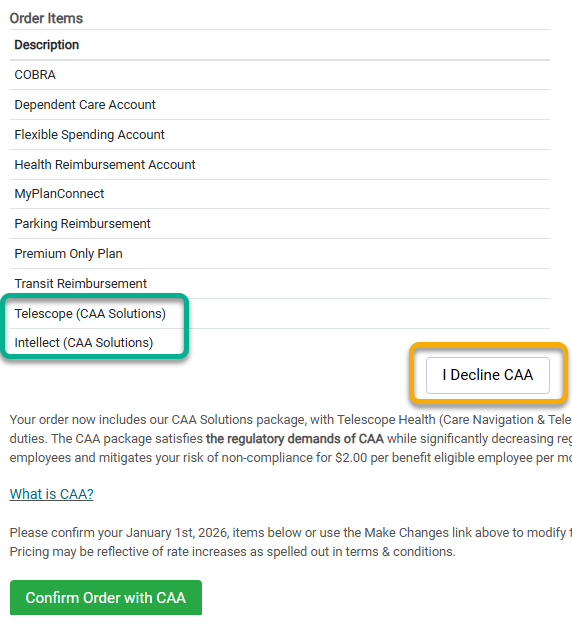
3. You will notice that additional benefits called Telescope and Intellect have been included at an additional cost. At this juncture, please confirm whether you would like to opt in to offering these benefits or decline adding them at this time. You can refer to this video conversation with our legal team regarding the CAA requirements for employers, as well as the following resources for each benefit: Telescope Virtual Care Navigation and Intellect Mental Health Navigation.
4. If you are choosing to add Telescope and Intellect, please click the green ‘Confirm Order with CAA’ button, as shown below:
5. If you are choosing to opt out of Telescope and Intellect, please click the white ‘I Decline CAA’ button as shown below:
6. After completing this step, click the blue I am done - Next button on the right-hand side of the yellow guidance panel to move on to the next step of your renewal.
Configure Copays
1. Once the yellow guidance panel at the top of the screen brings you to this step in your renewal, the Copays row within the General tab will open. A message appears stating, "please provide your copays so we can automatically substantiate card swipes for copay amounts. This is optional."
2. Click the +Add Copay button.
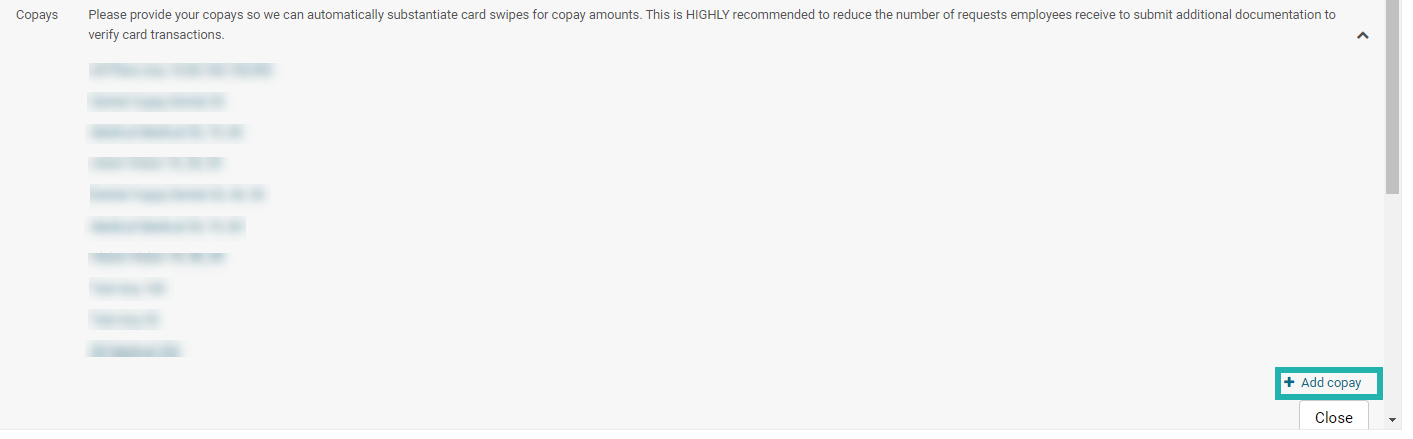
3. When the Add Copay box appears, enter the requested copay information.
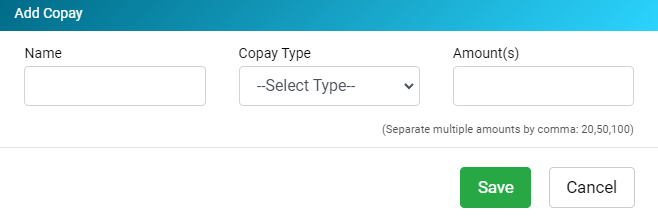
4. Click Save.
5. Repeat steps 2-4 again until all copays are added.
6. When this part of your renewal is completed, click the blue I am done - Next button on the right-hand side of the yellow guidance panel to move on to the next step. Ameriflex will receive a notification to review the item and proceed accordingly.
Configure your Enrollment Submission Method
Once the yellow guidance panel at the top of the screen brings you to this step in your renewal, the Enrollment Information row inside of the General tab will open.
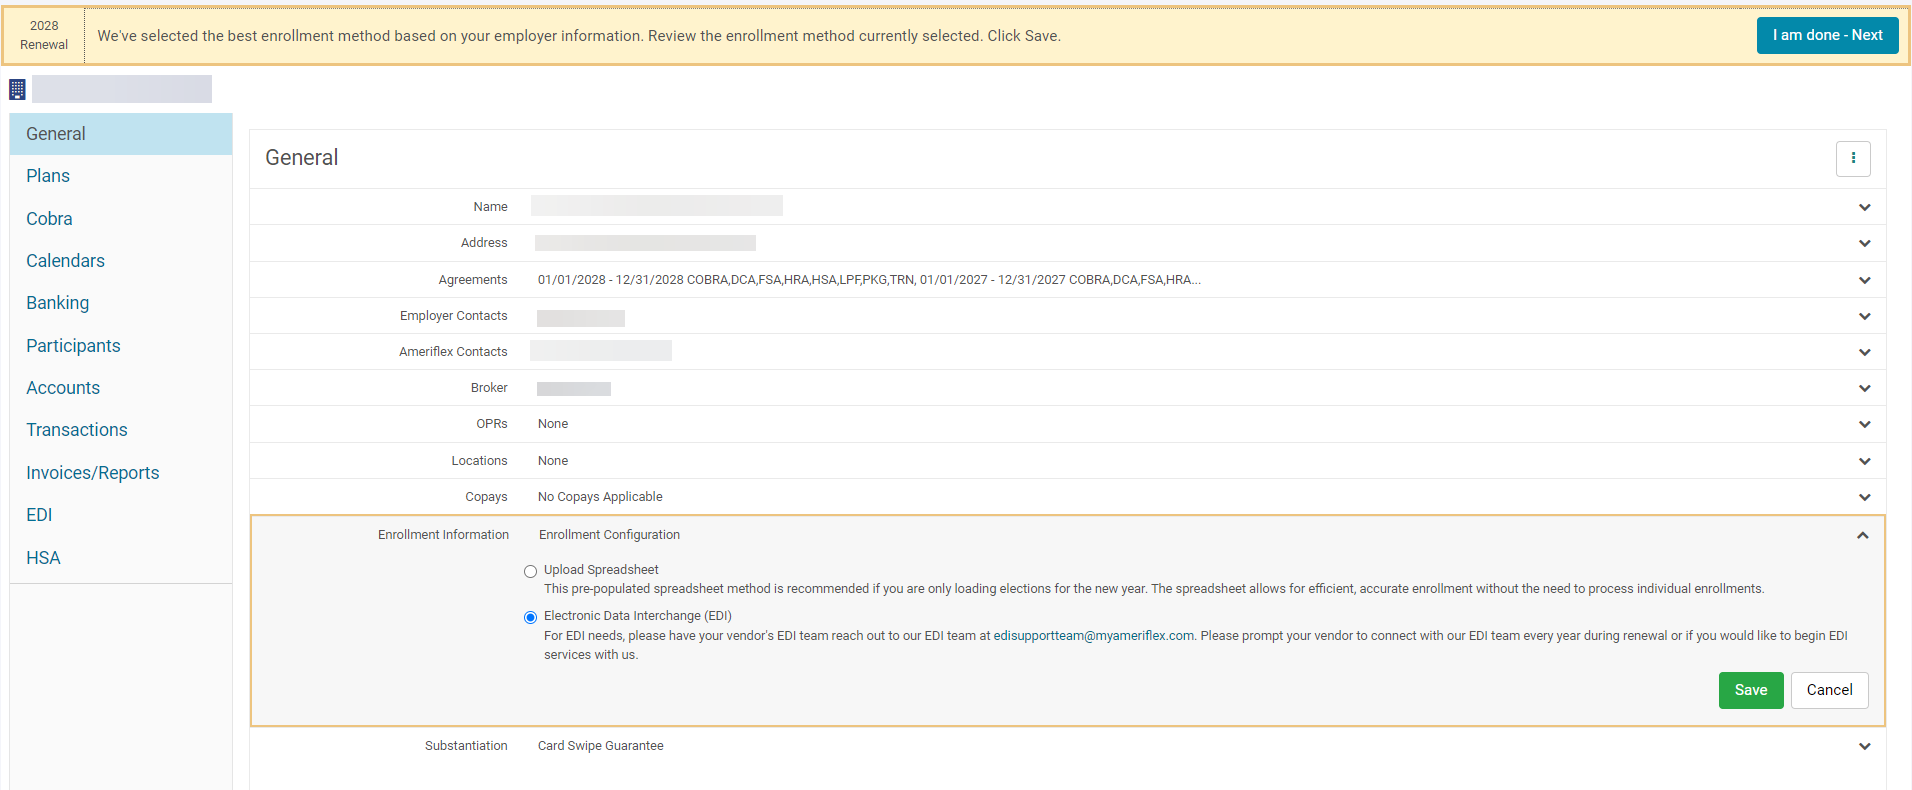
The recommended enrollment method will already be highlighted/selected for you. There are four ways to complete enrollments at Ameriflex:
- Upload Spreadsheet (preferred method)
- Online Enrollment
- Portal Based
- Electronic Data Interchange (EDI)
Continue reading to see the different methods that are available to you to help you complete your enrollments.
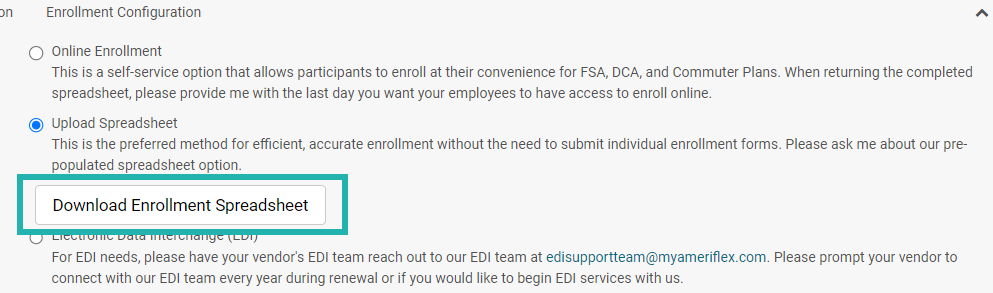
Method 1: Upload Spreadsheet (preferred method)
1. Beneath the Upload Spreadsheet option, click the Download Enrollment Spreadsheet button.
2. After the file downloads to your desktop, open the file, fill out the spreadsheet, and Save.
Method 2: Online Enrollment
Participants can enroll in FSA, DCA, and Commuter Plans online at their convenience. Ameriflex also needs a census with all benefit eligible employees to generate the online enrollments. After the online portal is set up, the employees can start the enrollment process.
Method 3: Portal-Based Enrollment
View this article for more information about this method: Portal Based Enrollment Method
Note: This method is recommended for FSA, DCA and Commuter Renewals.
Method 4: Electronic Data Interchange (EDI)
For EDI needs, have your payroll vendor's EDI team reach out to our EDI team at edisupportteam@myameriflex.com. Also, ask your payroll vendor to connect with our EDI team every year during renewal or if you would like to begin EDI services with us.
Configure Plan Design
1. Once the yellow guidance panel at the top of the screen brings you to this step in your renewal, the Plans tab will open.
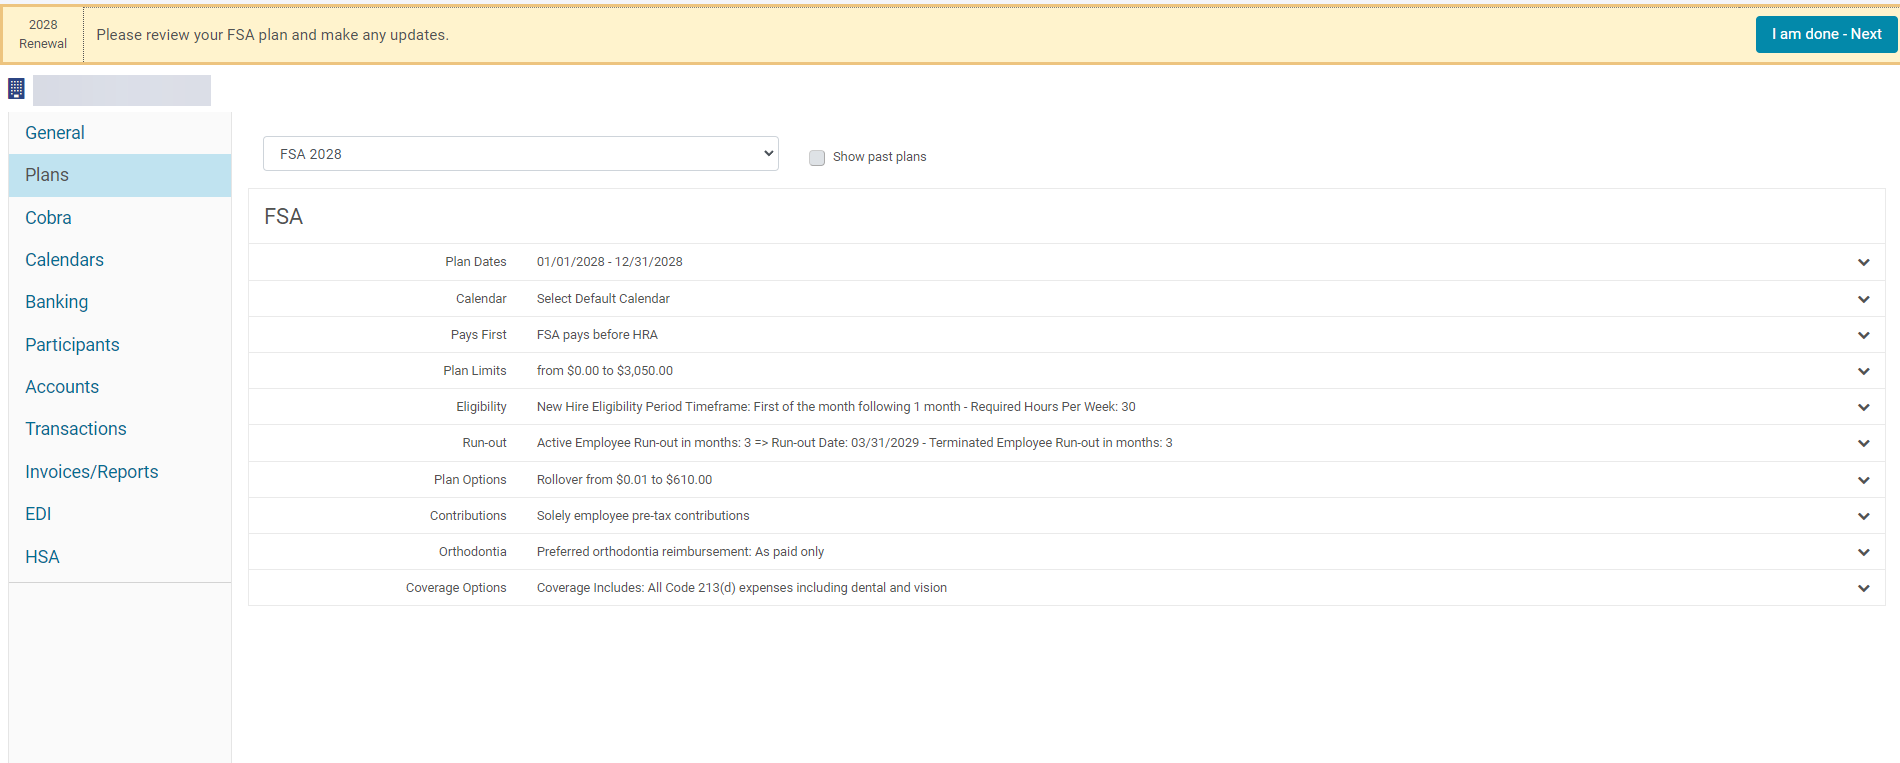
2. Click the drop-down arrow and select a plan from the list of options.
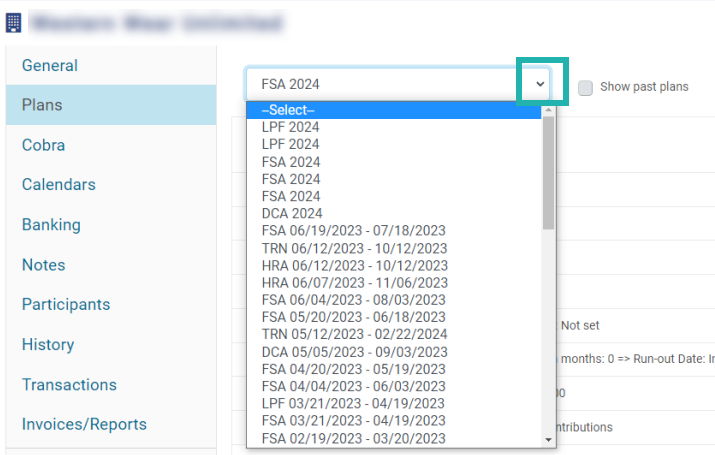
3. The page refreshes to show the details of the plan you chose. Click the down arrow for each of the following sections to expand the section:
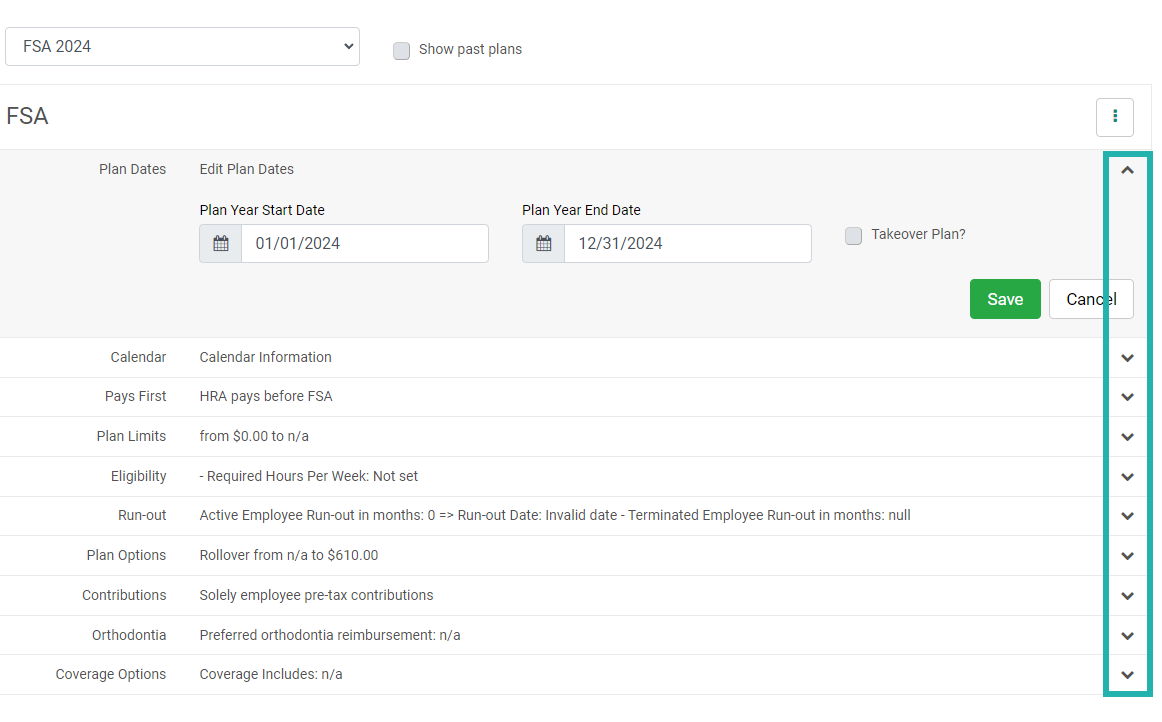
- Plan dates
- Calendar
- Pays first
- Plan limits
- Eligibility
- Run-out
- Plan options
- Contribution
- Orthodontia
- Coverage options
4. Review the information in each section and make necessary updates to the options for each plan.
5. Click the green Save button.

6. Repeat steps 2-5 for each plan you select to review.
7. When this part of your renewal is completed, click the blue I am done - Next button on the right-hand side of the yellow guidance panel to move on to the next step. Ameriflex will receive a notification to review the item and proceed accordingly.