Calendars are auto-populated for the new plan year, based on the frequency of the prior plan year. To update your calendar or add a calendar, complete the following steps:
1. Once logged into the Ameriflex Employer Portal, locate and click Calendars on the left side of the page.

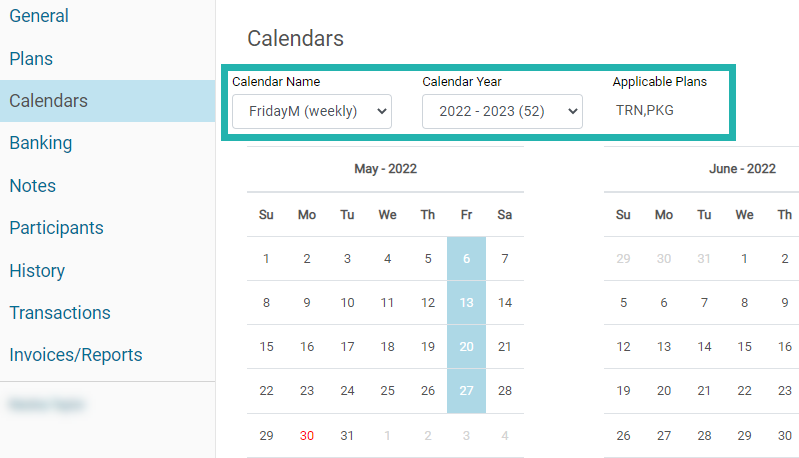
Under Calendars, you have the options to filter by Calendar Name, and Calendar Year where each calendar is set up to a specific plan.

- Calendar Name: This will show the calendar's name for the specific pay period calendar. Avoid duplicate names to avoid any confusion.
- Calendar Year: Current plan year while showing how many pay periods in the calendar.
- Applicable Plans: Provides with the names of the plans enrolled in. Where you can also edit the dates for that specific calendar.
2. Click Edit to make any updates to the payroll dates.

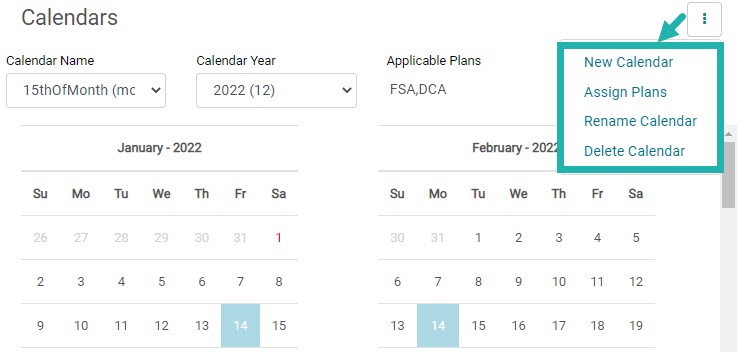
3. Select the ellipses (3 dots) to access calendar options.

A new dropdown menu appears.

The following options appear:
- New Calendar: Be sure to review the existing calendar and edit when necessary. If you must create a new calendar we recommend using a new calendar name so there are no duplicates. Duplicate calendars add confusion and delay the renewal process.
- Assign Plans: The applicable plan will only apply to that specific calendar selected/created.
- Rename Calendar: You can rename the calendar to avoid any confusion. We advise a name where you would know what it is about. For example “15thLast DayBus” meaning the 15th and last business day of every month.
- Delete Calendar: Delete a calendar not wanted
Notes: 1) Multiple calendars can be linked to the same plans. For example, FSA for clients has participants with 9, 10, and 24 pays. 2) The first pay date must occur after the plan start date. Dates can be adjusted manually by unselecting highlighted dates and selecting new dates.