1. Log in to the Ameriflex Employer Portal.
2. From the left-hand menu, select COBRA.
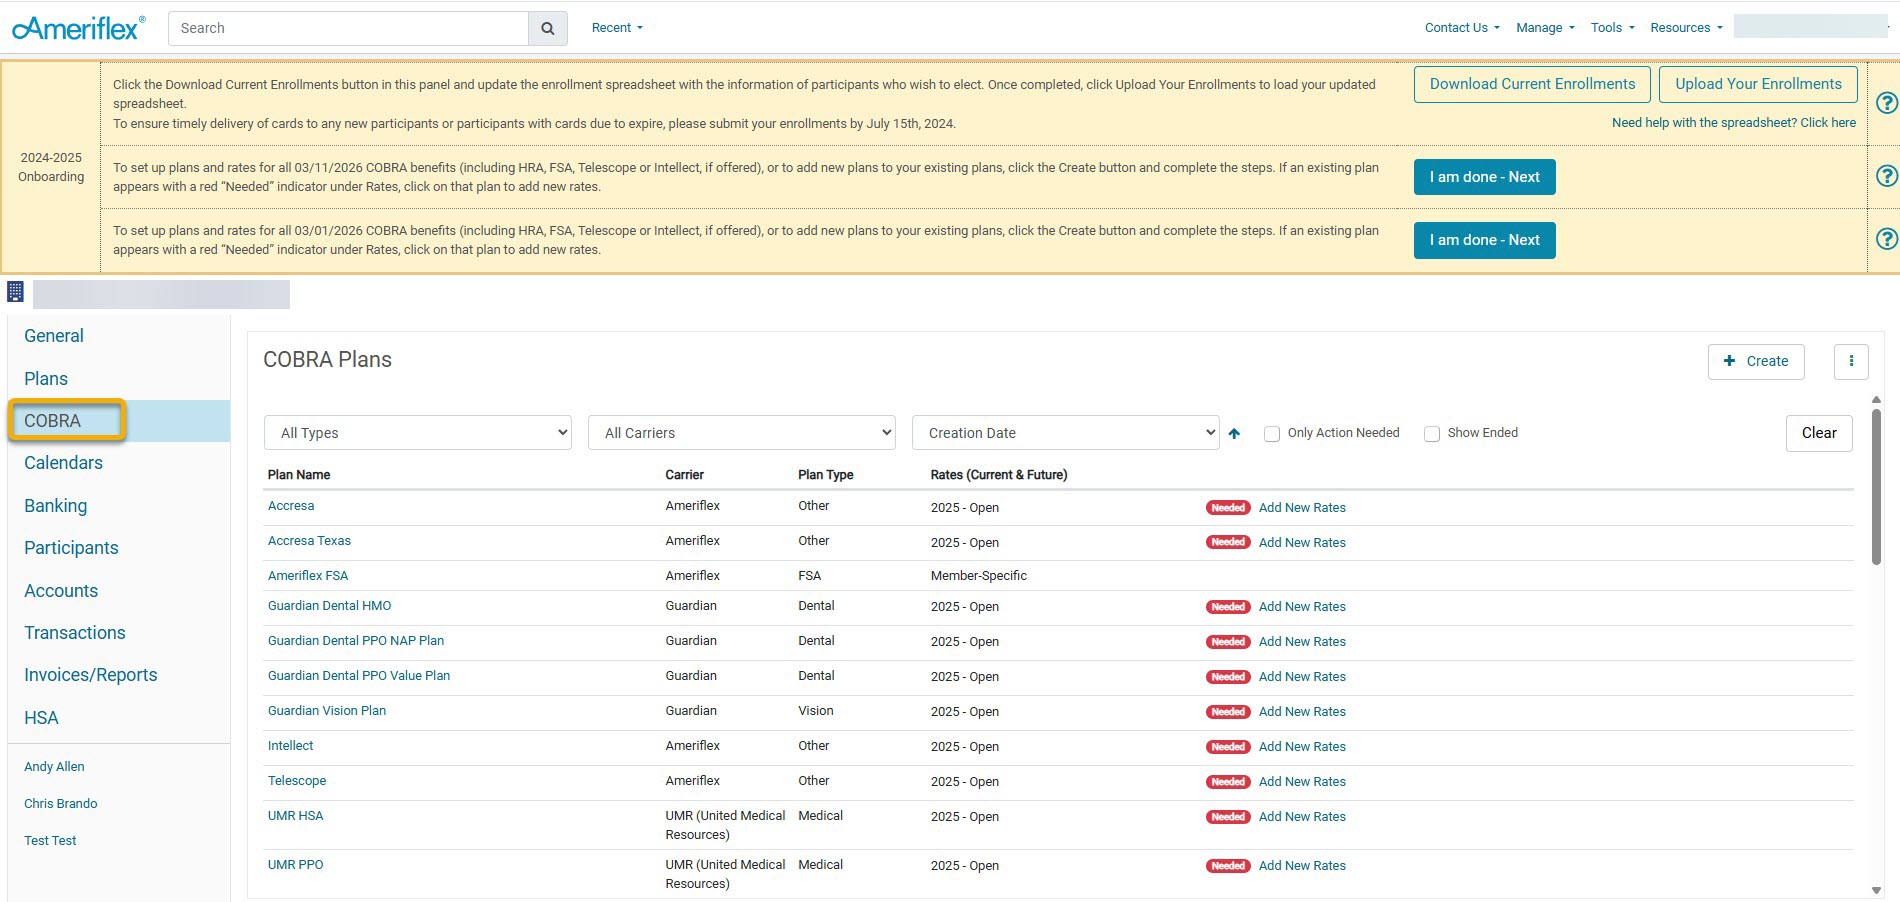
3. To add a new plan, click the + Create button on the main COBRA tab.

4. On the Add COBRA Plan pop-up, fill out the requested information related to the plan.
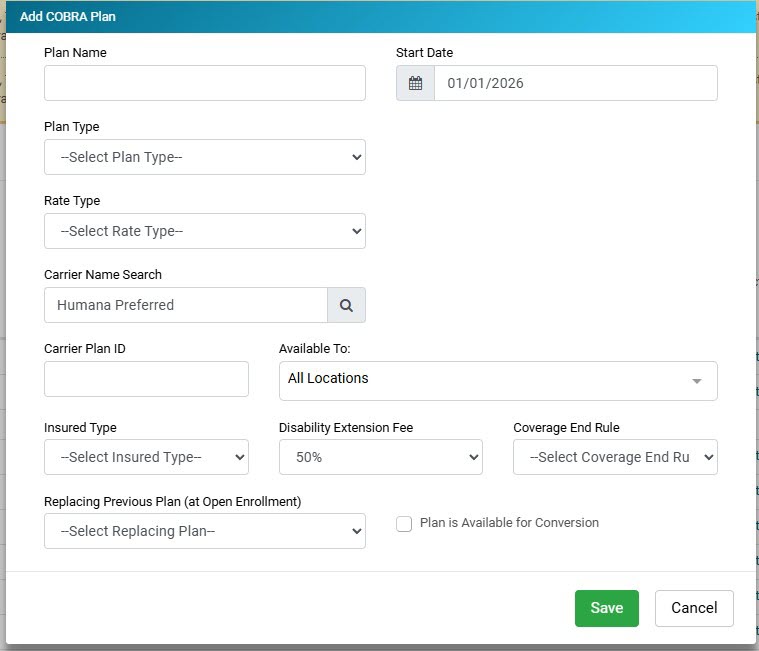
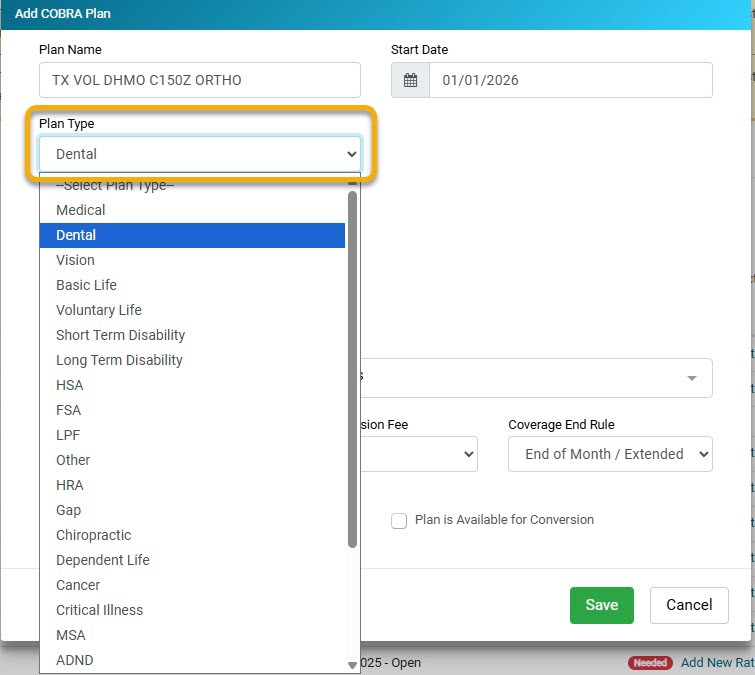
5. Enter Plan Name: The Plan Name will be the name provided by the carrier, or possibly a part of the description of the plan.
6. Select Plan Type: From the drop-down, select the option that corresponds to this specific plan that you are creating.
.jpg)
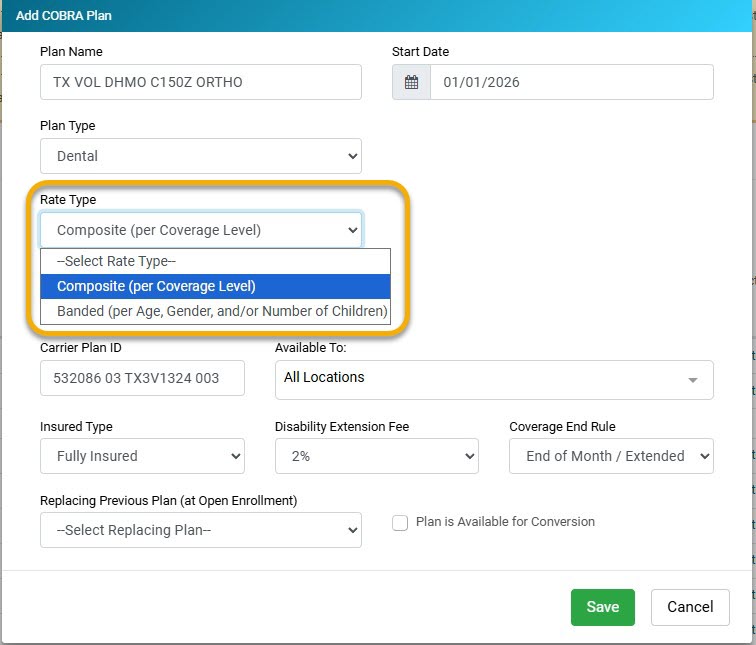
7. Select Rate Type: From the drop-down, select the option that corresponds to the specific plan that you are creating.
- Composite: Rates that are based on Employee, Employee + Spouse, Employee + Child, etc.
- Age Banded: Rates based on age ranges of employees
8. Select Carrier Name: You will select Humana Preferred. As you begin typing in the Carrier Name drop-down, a list should appear. Select Humana Preferred from the list.

9. Enter Carrier Plan ID: The Carrier Plan ID will include a group of information, including the Group ID, Product Code, Package/Benefit ID, and Division ID. Each will be separated by spaces that correspond with that product description and/or plan name. You will obtain this information directly through Humana by using the COBRA data spreadsheet that your Client Success Specialist sent to you at the beginning of implementation.
-
Product code:
-
Medical - 01
-
Vision - 60
-
Dental - 03
-
10. Select Available To: If you have additional locations listed, you will select from the drop-down menu which location this is available to.
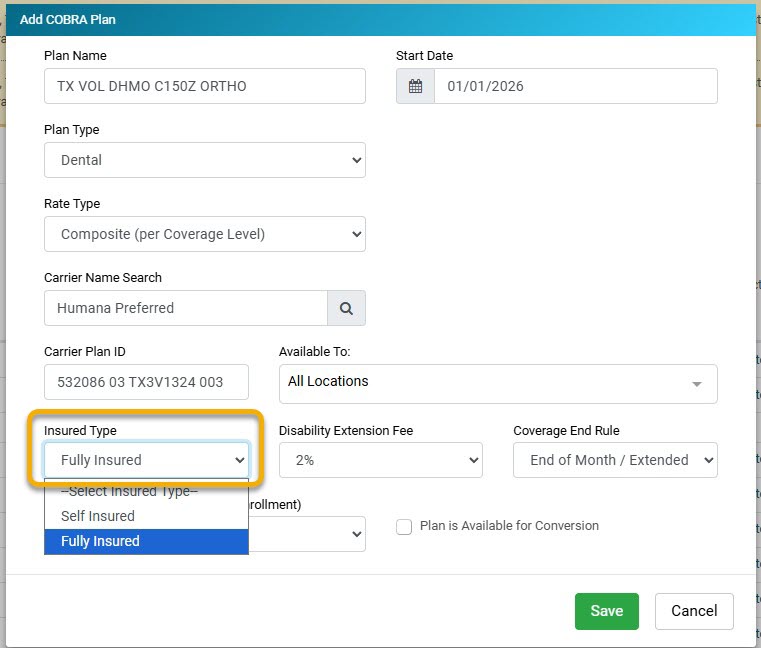
11. Select Insured Type: From the drop-down menu, you will select either Fully Insured or Self Insured.
-
Fully Insured: This is when the insurance company reviews and pays all claims. (This is the most frequent answer)
-
Self-Insured: Do you act as your own insurance company, meaning you review and pay all claims? If yes, select this option. If not, you will select Fully Insured.
12. Select Disability Extension Fee: From the Disability Extension Fee drop-down, you will choose the Disability Extension Fee. This will be 2% or 50%.

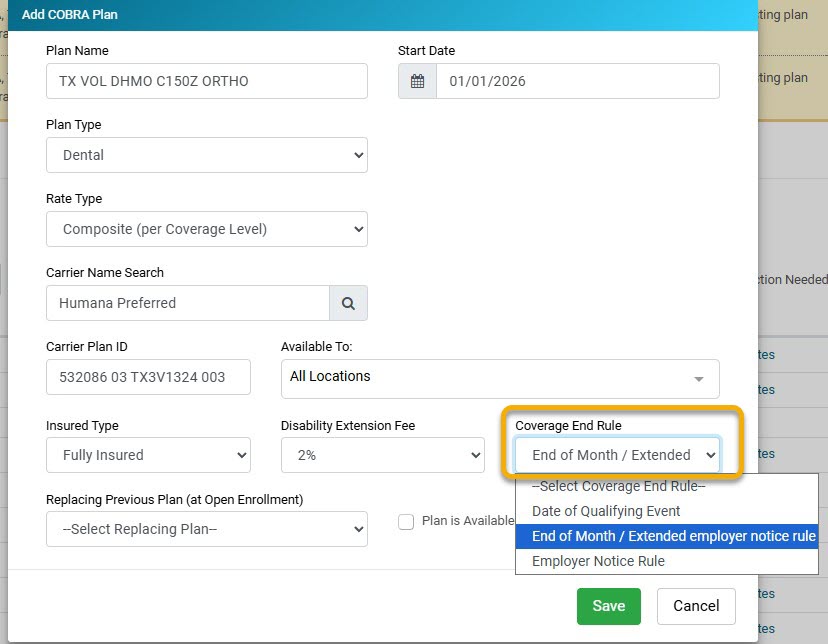
13. Select Coverage End Rule: Choose the coverage rule from the drop-down menu.
- Date of Qualifying Event - Employees' coverage with the group will terminate on the date of the qualifying event. COBRA coverage will start the following day. For example, if an employee is terminated on 04/25/2022, COBRA will start on 4/26/2022.
- End of Month/Extended Employer Notice Rule - Employees will have coverage with the group until the end of the month they are terminated. COBRA coverage will begin on the 1st of the following month. For example, the employee is terminated on 4/25/2022, and COBRA starts on 05/01/2022.
- Employer Notice Rule (also known as Wash/Roll Rule) - If an employee is terminated between the 1st and 15th, their COBRA will start the following day. If they are terminated through the 16th-31st, their COBRA will start on the 1st of the following month. For example, if an employee is terminated on 4/12/2022, COBRA will start on 4/13/2022; if an employee is terminated on 4/25/2022, COBRA will start on 5/1/2022.
.jpg)
14. Select the green Save button.
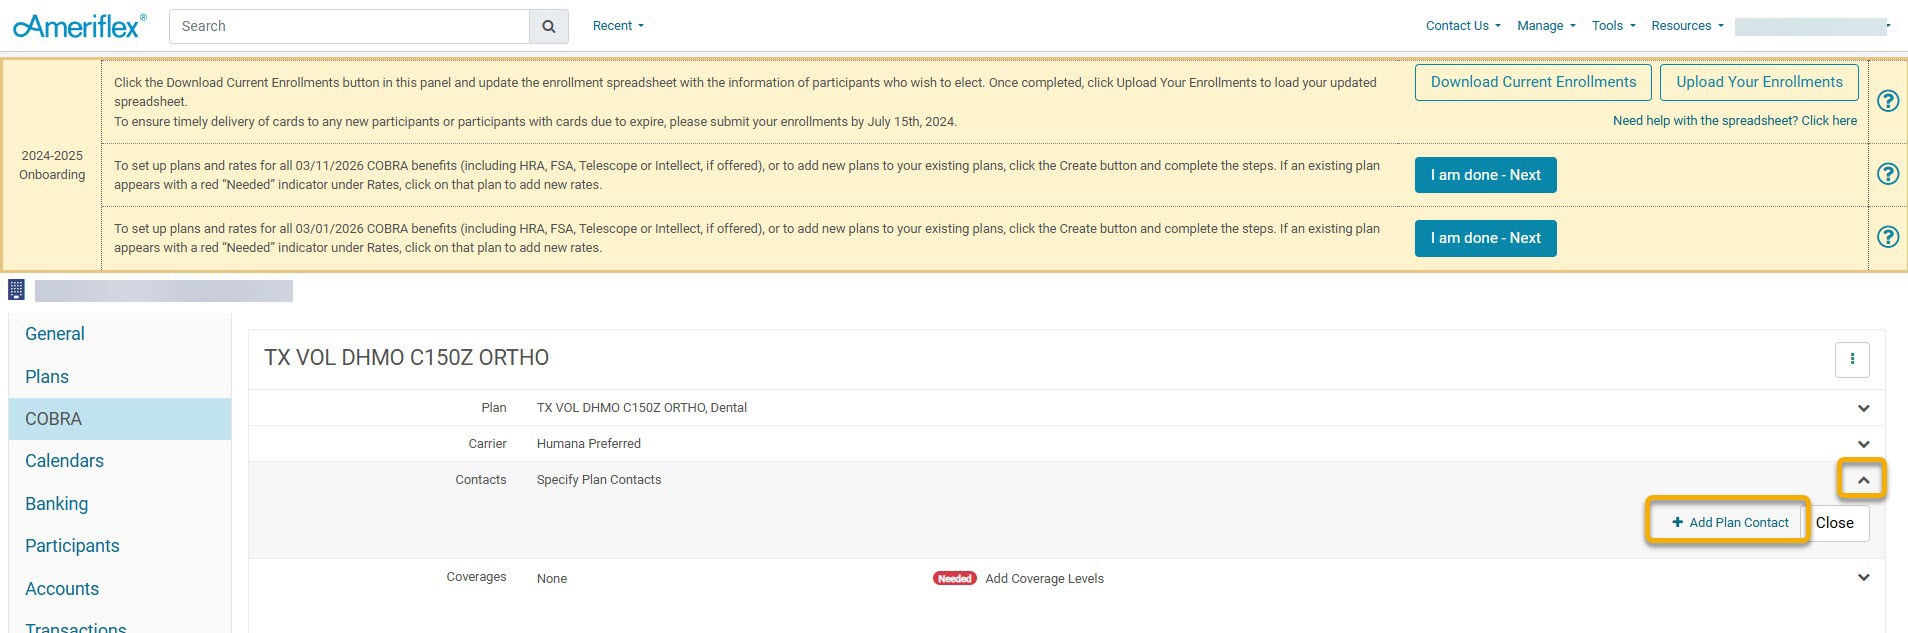
15. On the general COBRA tab, select the Contacts drop-down arrow, and click the blue + Add Plan Contact hyperlink.
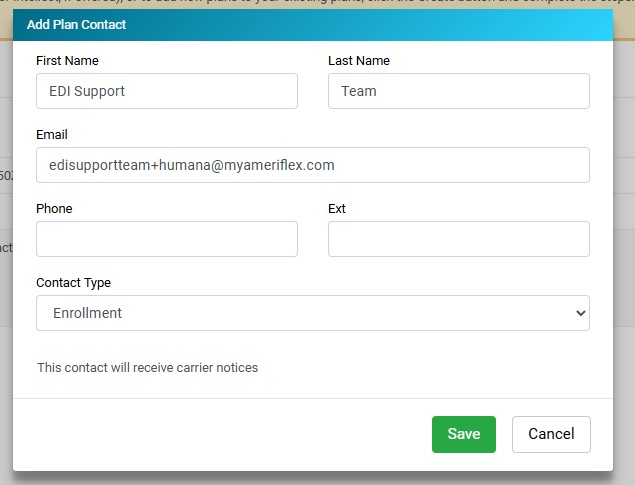
16. On the Add Plan Contact pop-up screen, add the following information:
- First Name: EDI Support
- Last Name: Team
- Email: edisupportteam+humana@myameriflex.com
- Contact Type: From the drop-down menu, select Enrollment.
.jpg)
17. Select the green Save button.
18. On the general COBRA tab, select the Coverages drop-down arrow, and click the blue Add Coverage Levels hyperlink.
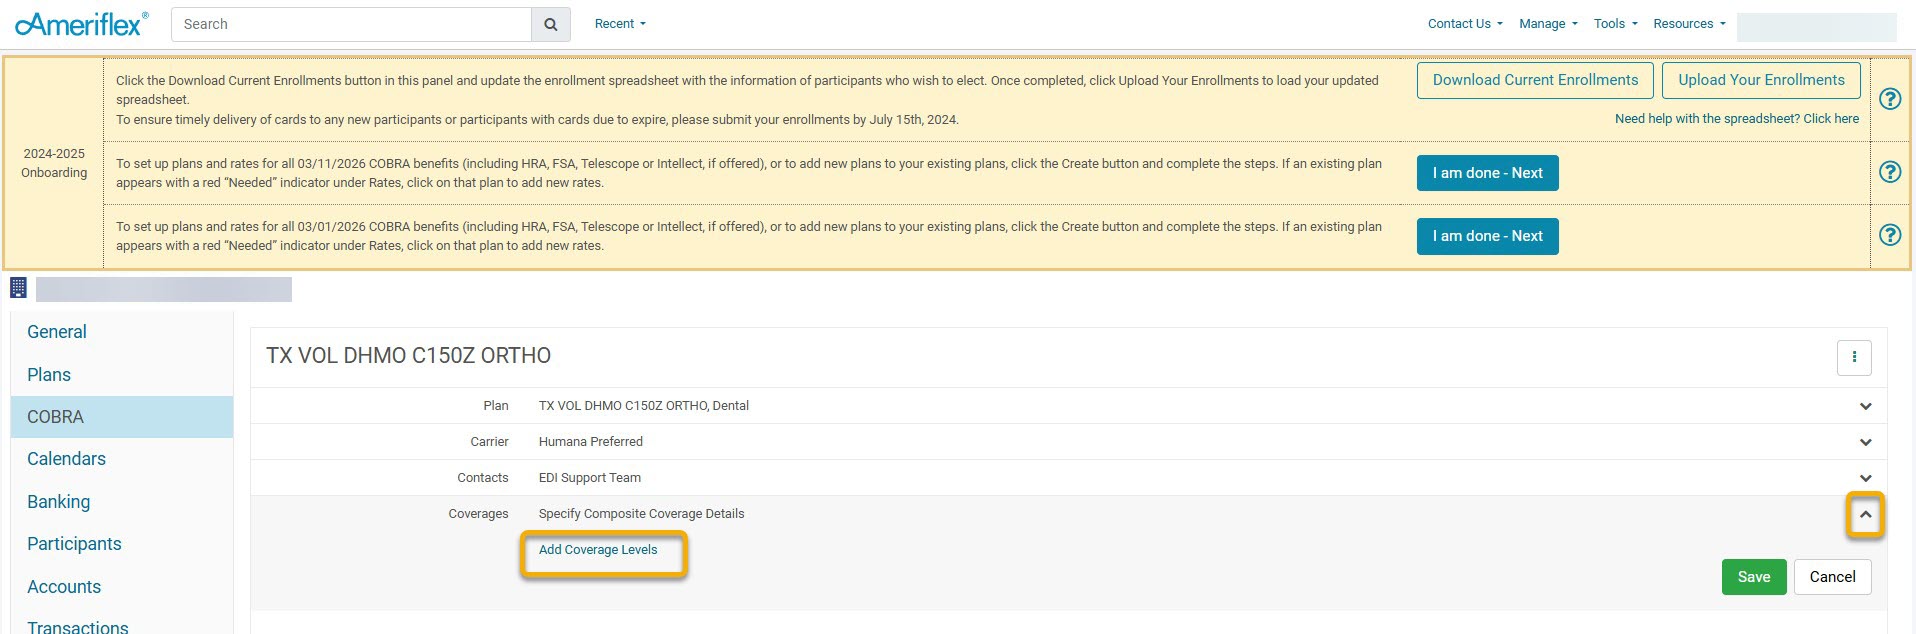.jpg)
19. Enter in the rates for each coverage level. Only fill in the fields that apply to you.
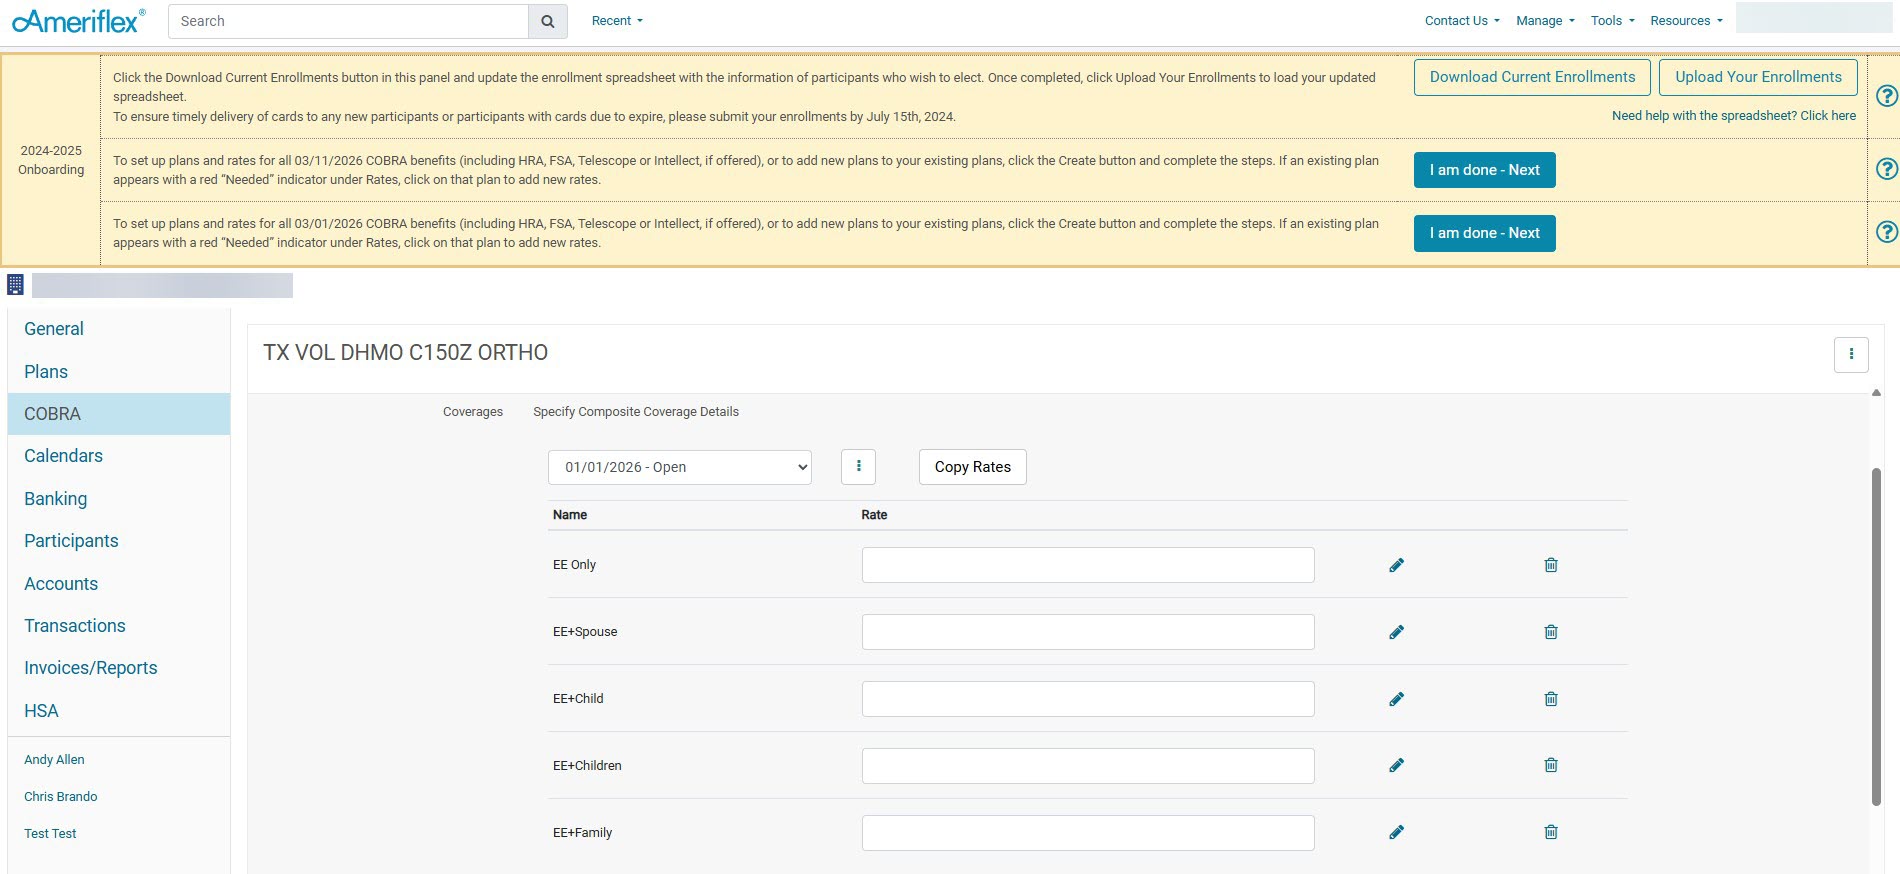.jpg)
20. Once you have entered your rates, select Save.
21. To add additional plans, follow steps 2-20.