When Should You Add a Dependent?
You should add a dependent to a qualified beneficiary's record if:
- The dependent was covered under the plan(s) at the time of the qualifying event.
- The dependent is losing coverage due to the same qualifying event.
- The dependent is entitled to elect COBRA continuation on their own (e.g., in the case of divorce or death of the employee).
Steps to Add a Dependent in the Employer Portal When Also Adding a Participant/Qualified Beneficiary (QB):
If the Qualified Beneficiary is not already in the system and you must add them:
1. Log in to your account through the Employer Portal.
2. Click the Participants tab on the left-hand side of the screen.
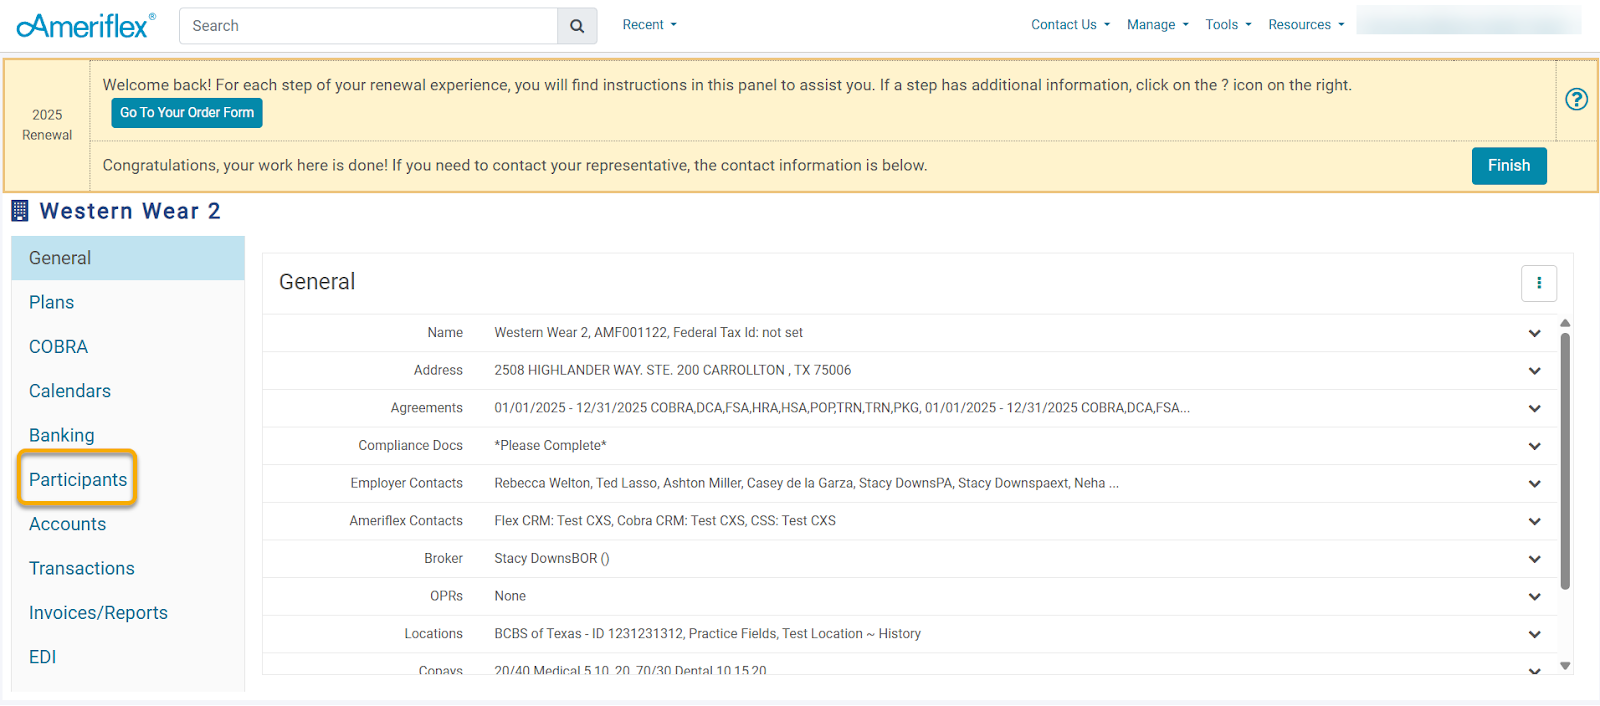
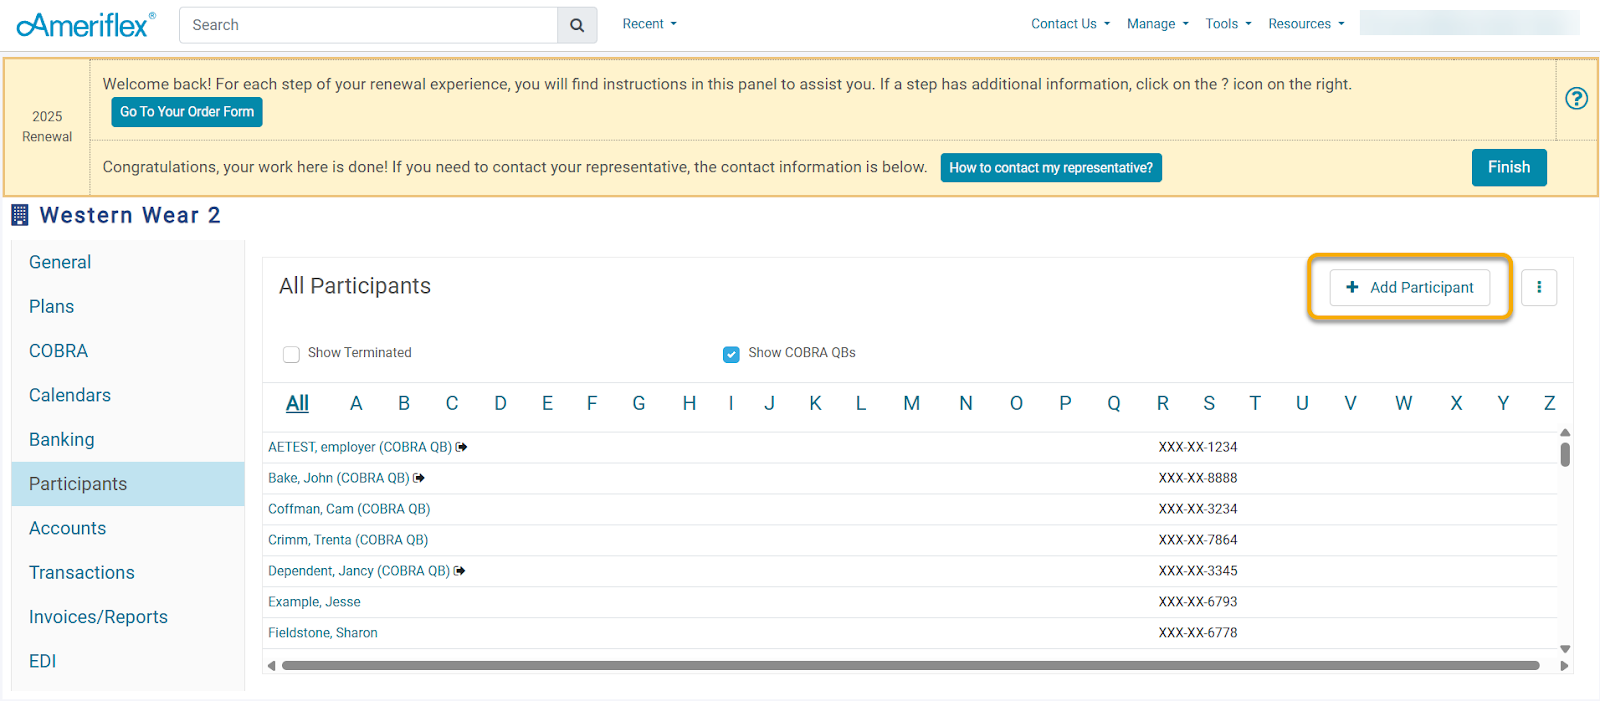
3. Click the +Add Participant button.
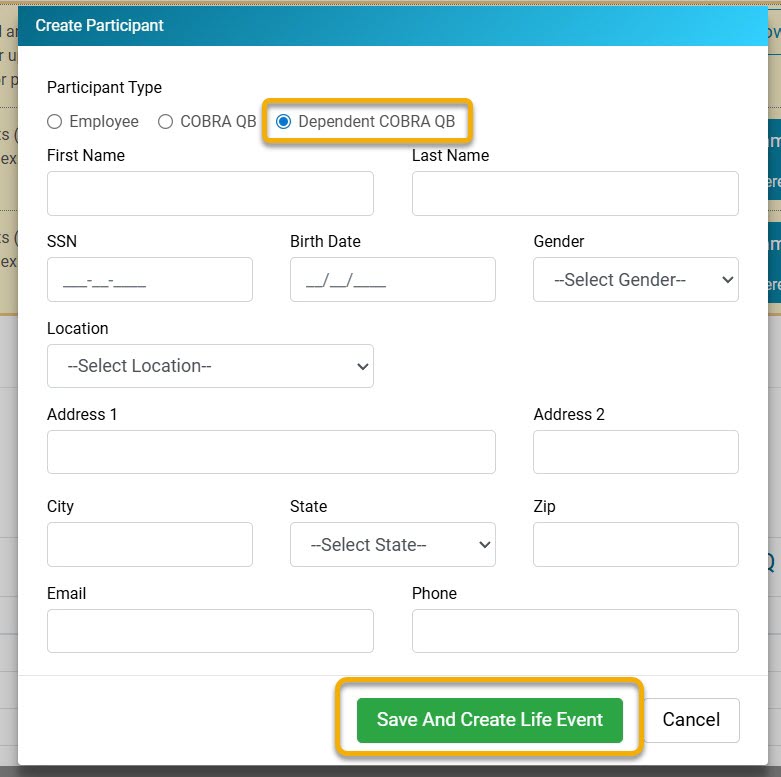
4. On the Create Participant pop-up screen, select Dependent COBRA QB, fill out all requested information, then click Save and Create Life Event.
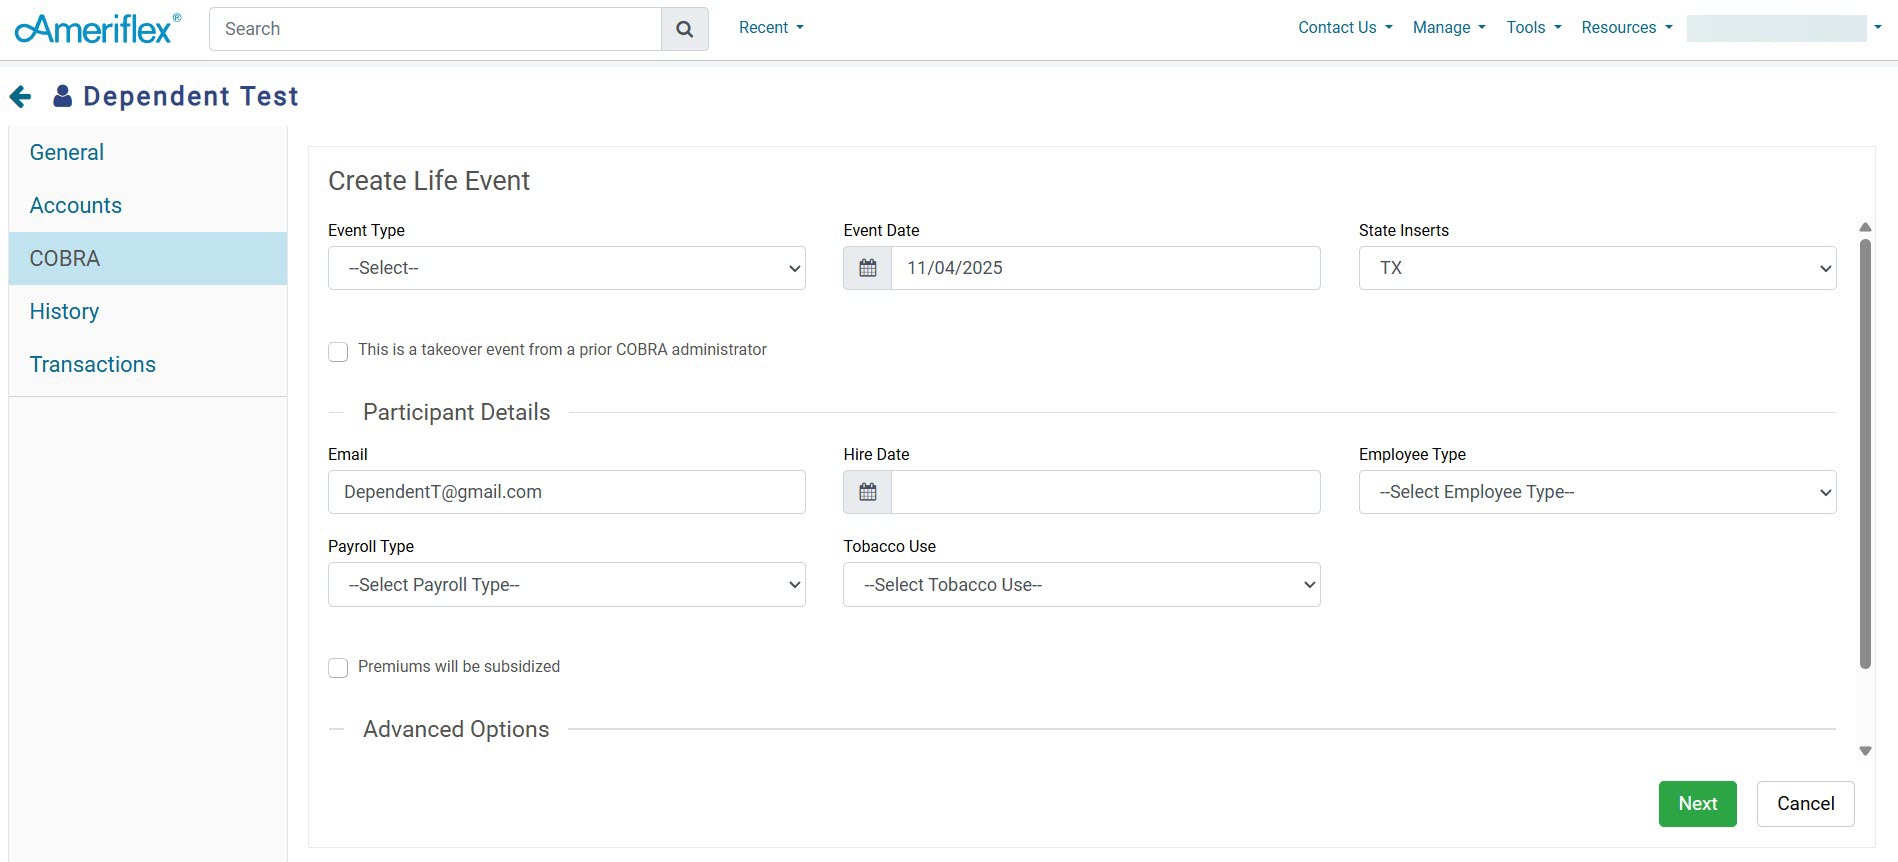
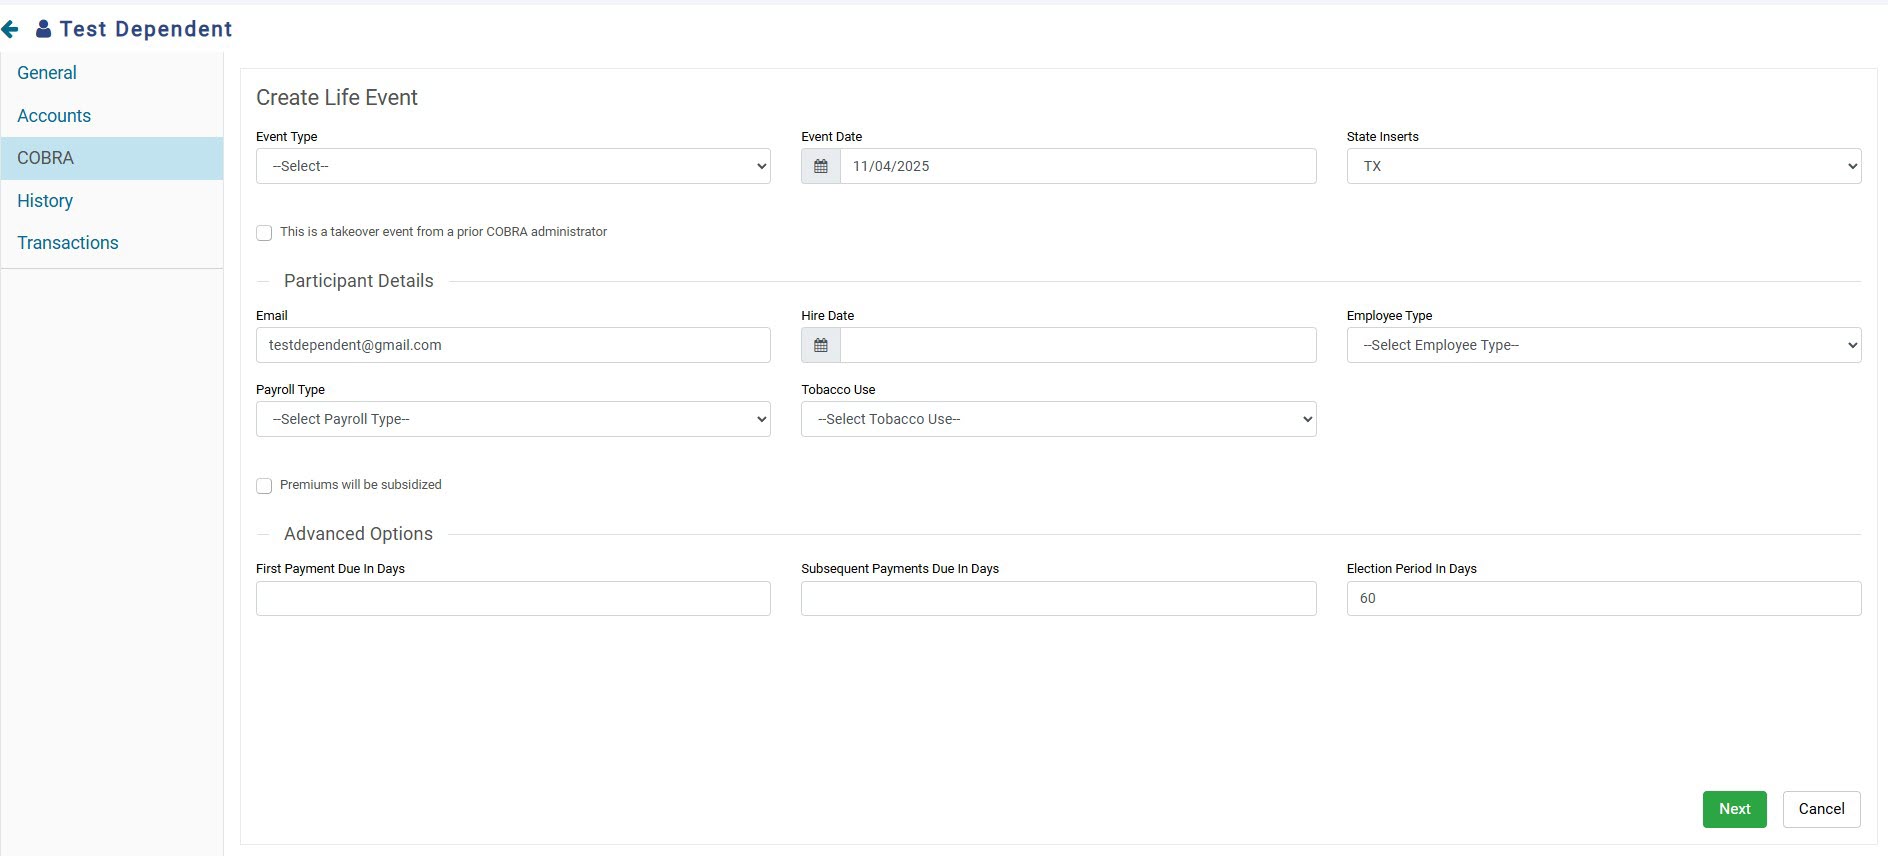
5. Select the Event Type drop-down menu, and choose the correct type from the list of options. Then enter the Event Date of the Life Event. Please note that under Participant Details, you will want to enter the Employee's Hire Date, Employee Type, and Payroll Type. Once the information is completed, click Next.
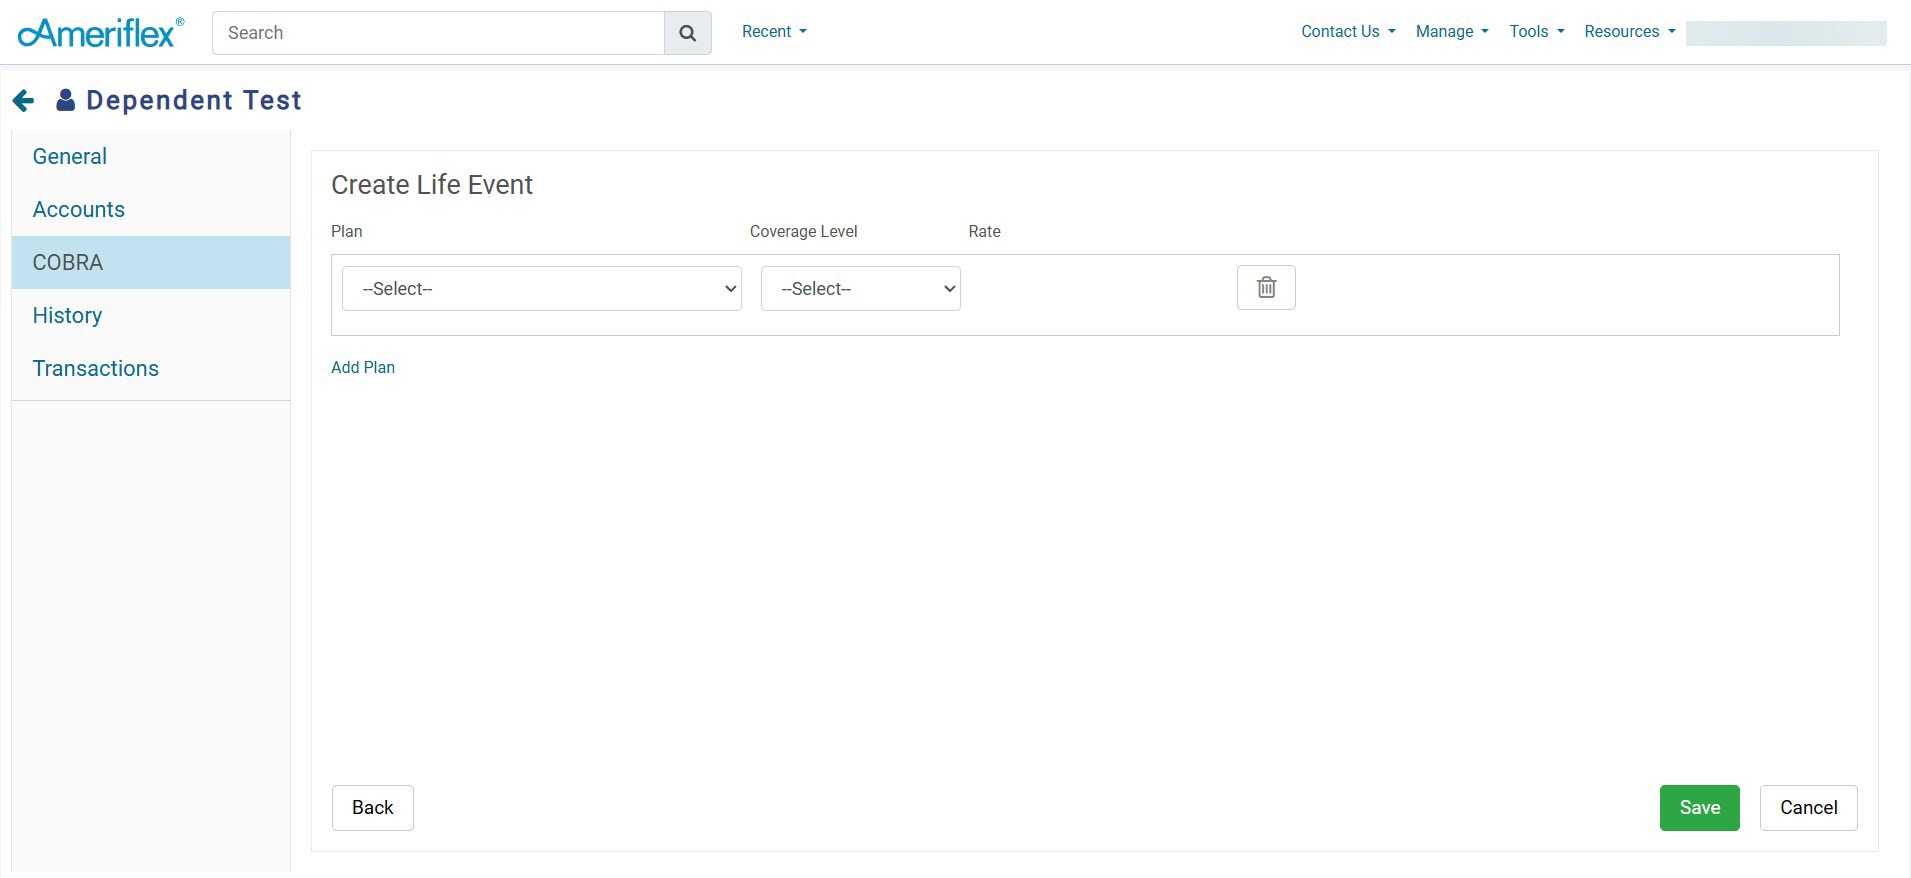
6. Select plans from the Plan drop-down menu. When selecting the plans for which a Qualified Beneficiary (QB) is eligible, ensure you also select the corresponding Coverage Level. The rate will adjust according to the selected coverage level.

7. If additional plans should be added, select the blue Add Plan hyperlink. Once all plans have been added, click Save.
8. On the Send Election Notice pop-up screen, click the green Send button.

The new Dependent Qualified Beneficiary has been added to the portal!
Steps to Add a Dependent in the Employer Portal When Adding a Qualifying Event for an existing participant/Qualified Beneficiary (QB):
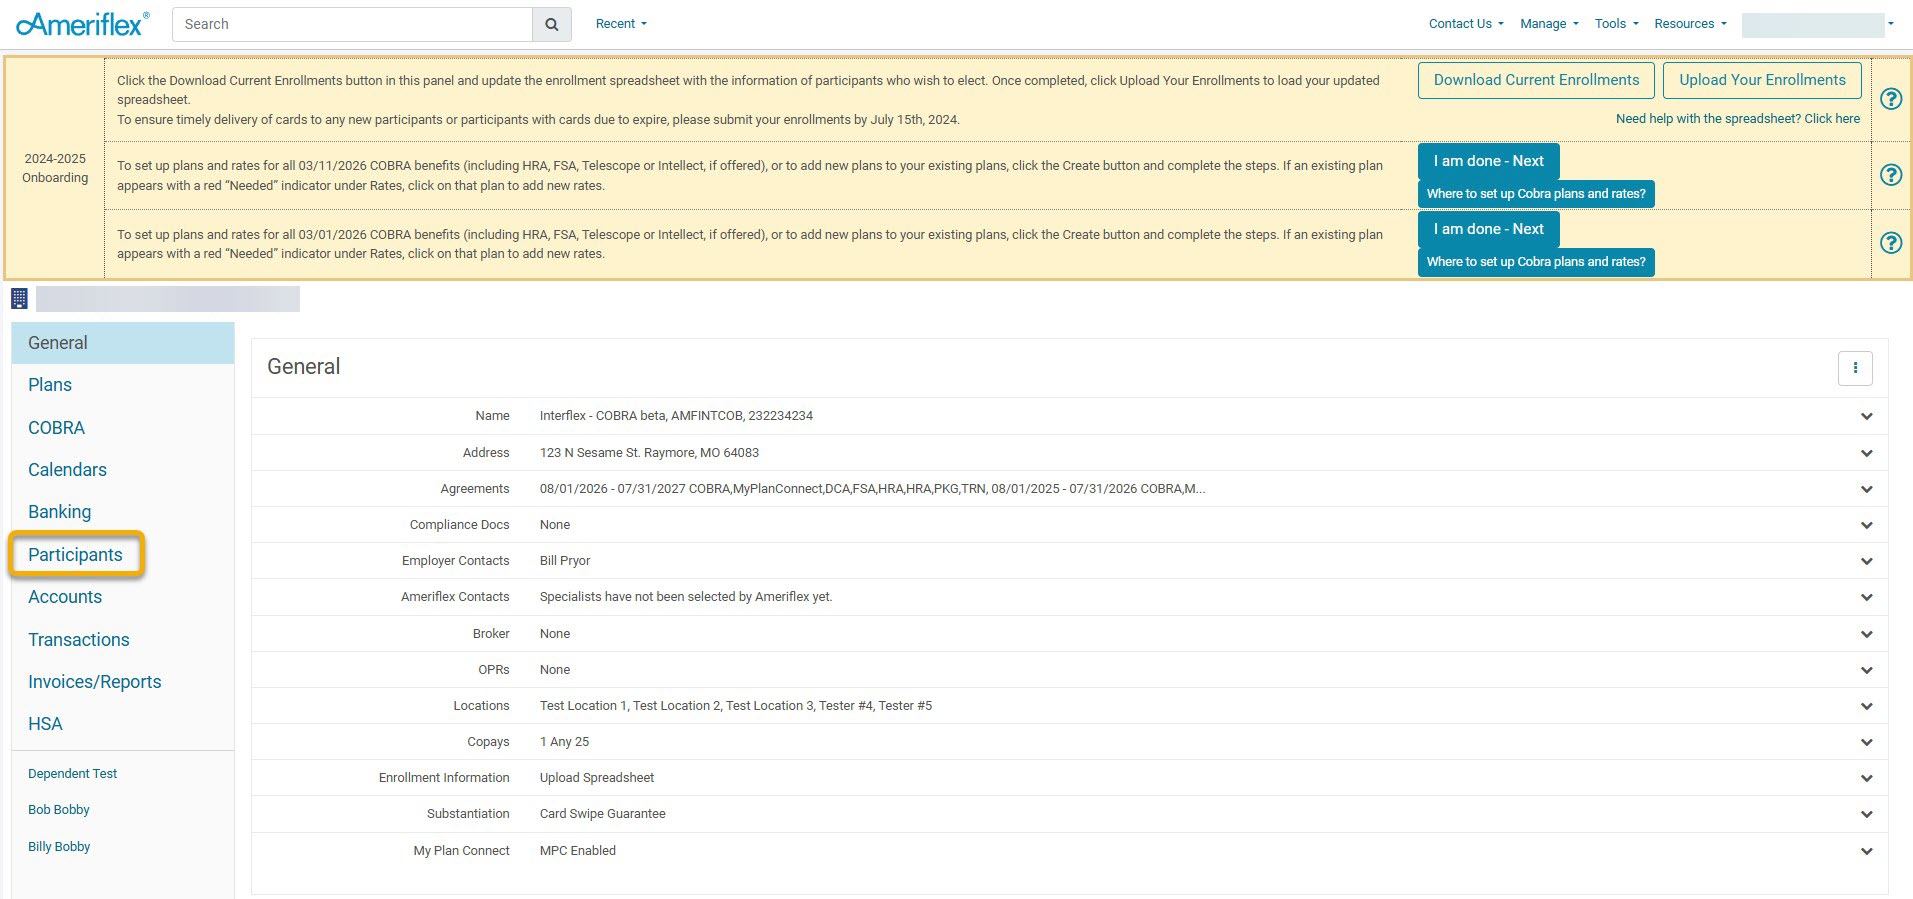
1. Log in to your account through the Employer Portal.
2. Click the Participants tab on the left-hand side of the screen.
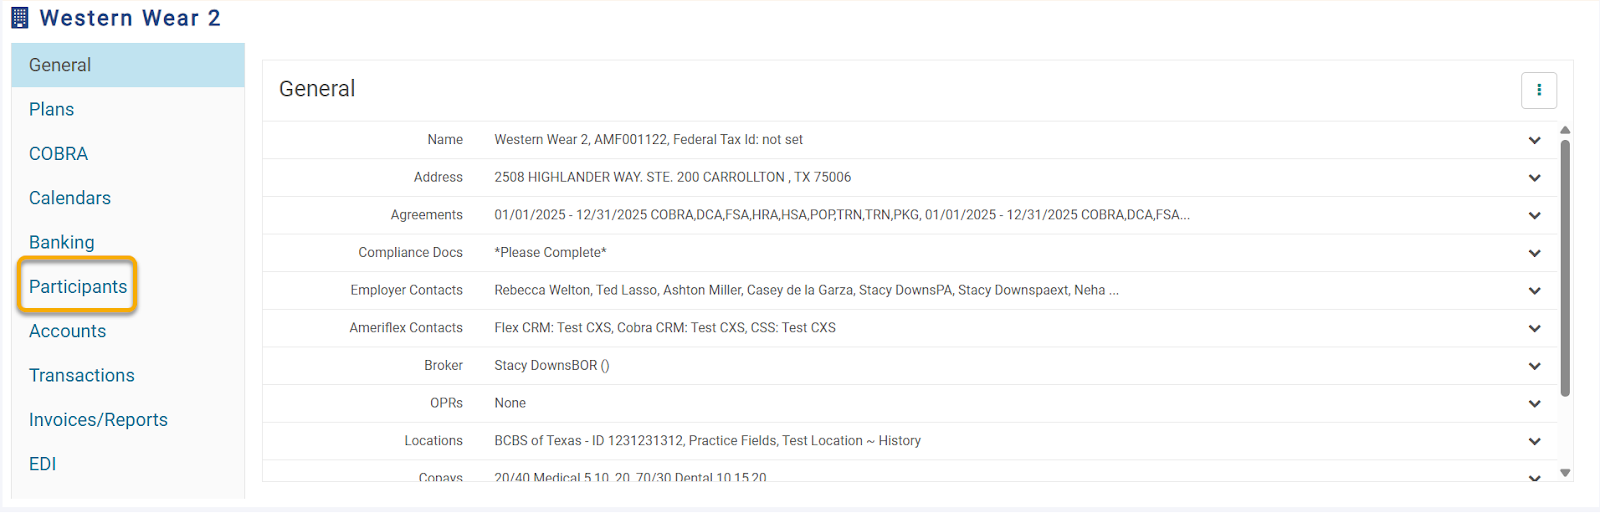
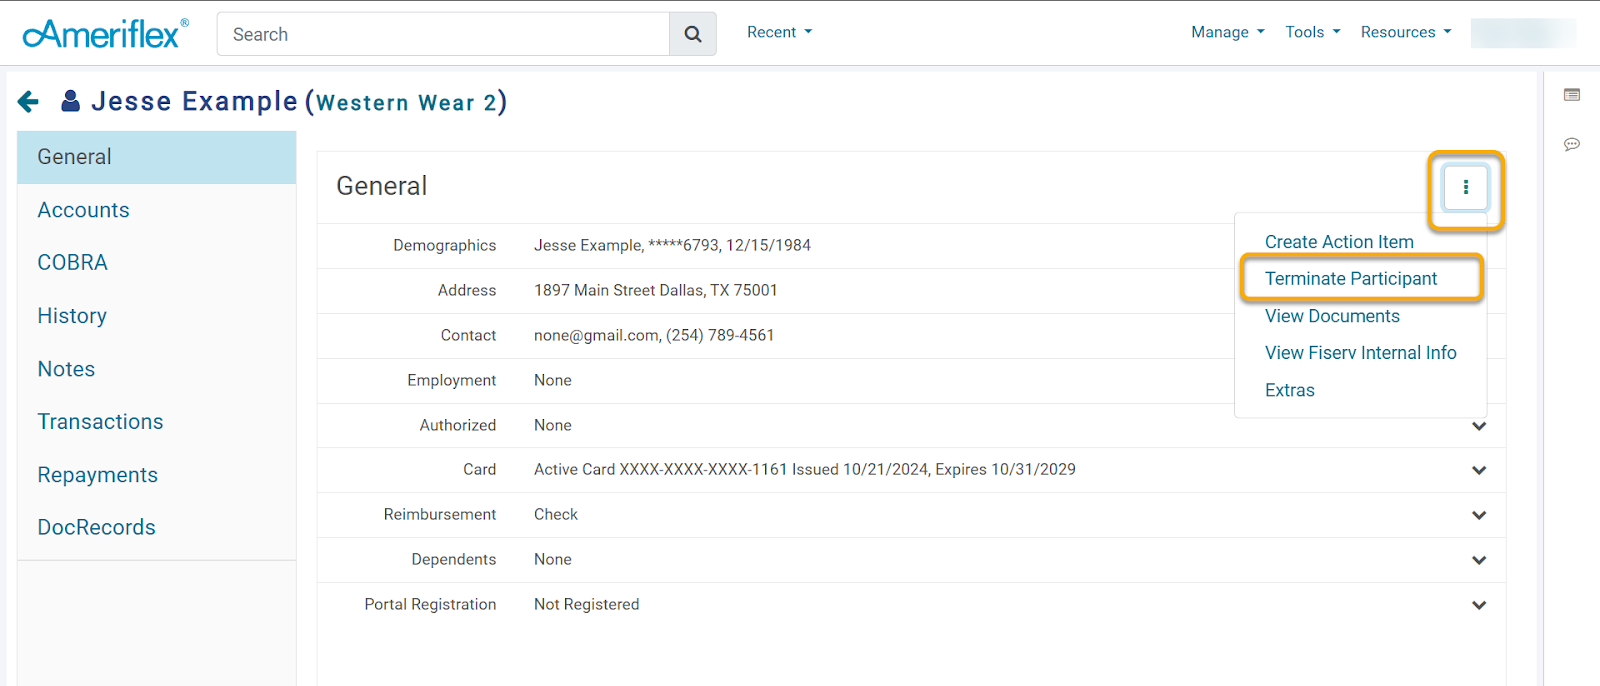
3. Find the participant that you would like to terminate and select their name.
4. To terminate the participant, click the three-dot ellipsis in the right corner and select the Terminate Participant option.
_Step_4.png)
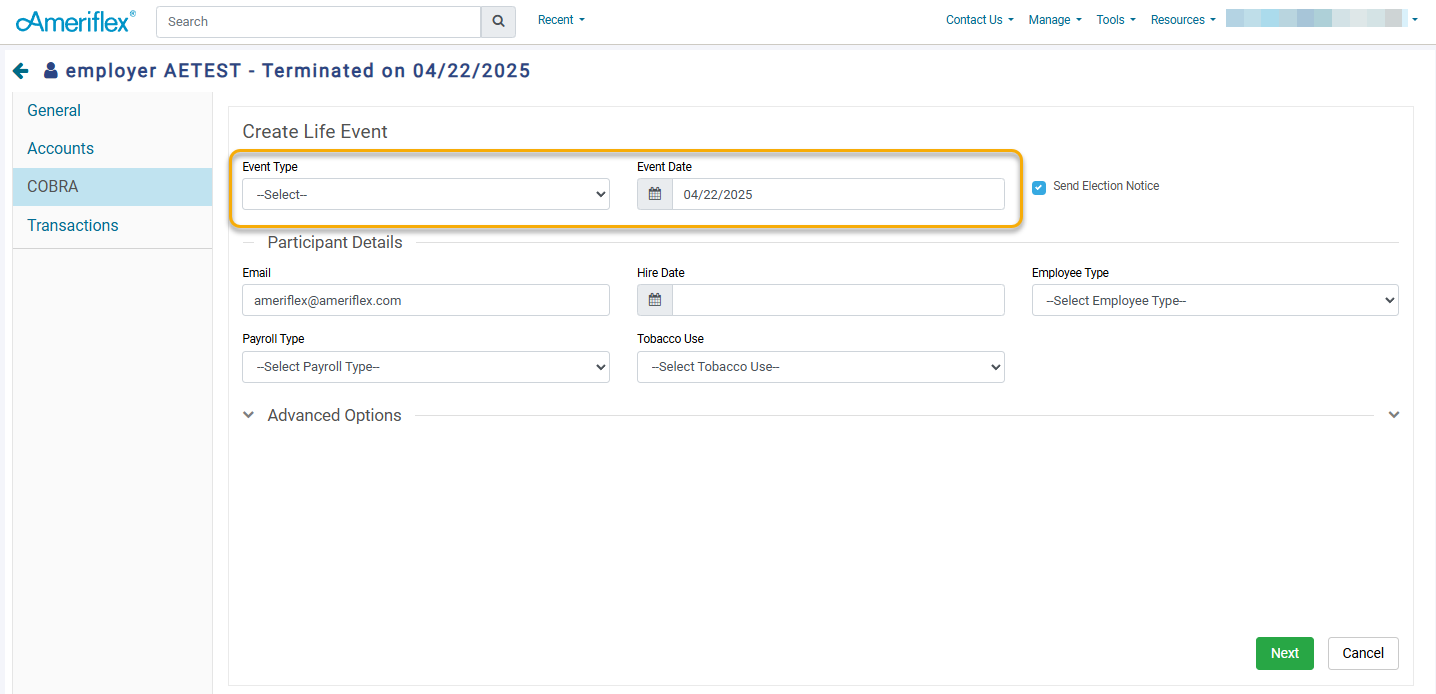
5. Select the Event Type drop-down menu, and choose the correct type from the list of options. Then enter the Event Date of the Life Event.
_Step_8.png)
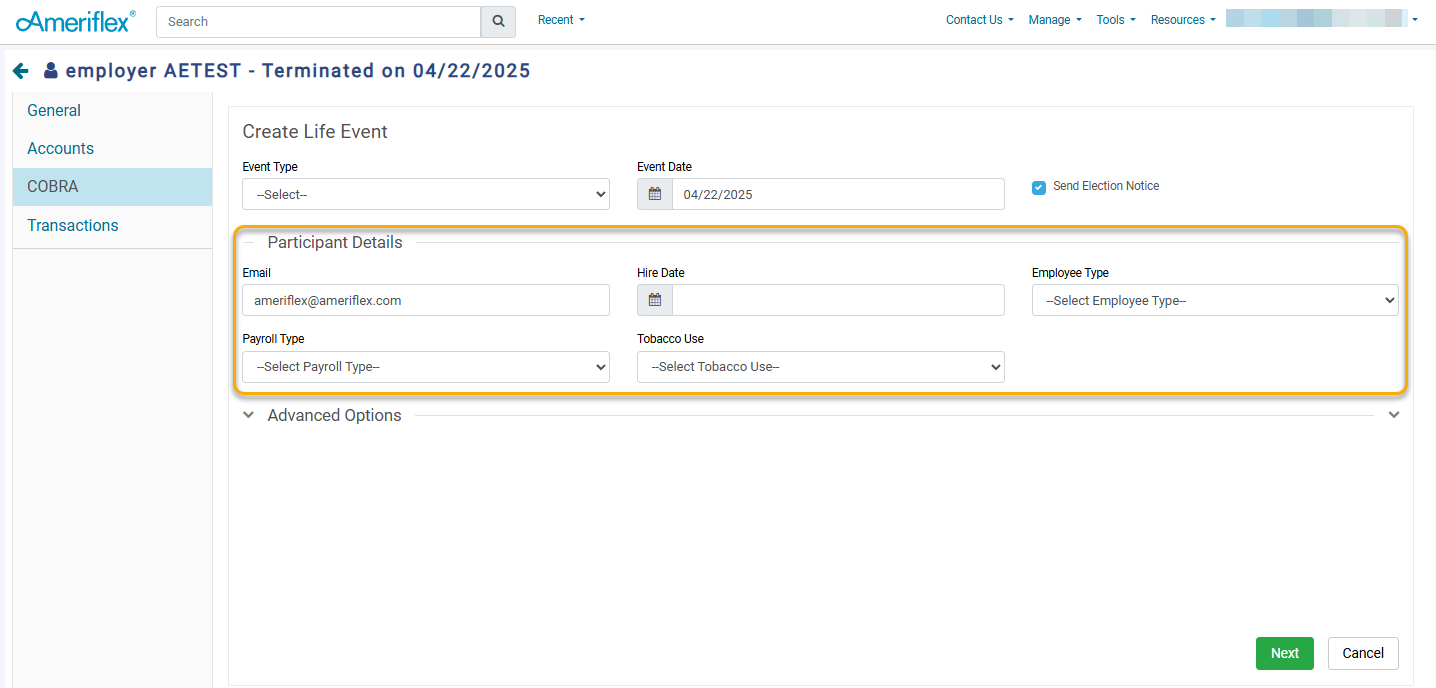
6. Then, complete the Participant Details section, including information such as Hire Date, Employee Type, Payroll Type, and Tobacco Use. When choosing Employee Type, select from Full Time, Part Time, Unknown, and Custom. If "Custom" is selected, an additional field titled "Custom Employee Type" will appear, allowing you to enter any text. Once finished, click the green Next button in the bottom-right corner.
_Step_9.png)
7. Select Plans using the drop-down. When selecting the plans for which a Qualified Beneficiary (QB) is eligible, ensure you also choose the corresponding Coverage Level. Based on the selected coverage level, any dependents will automatically populate in the Dependents section. The corresponding rate will also display next to the Coverage Level. The rate will adjust depending on the coverage level selected.
8. When selecting a coverage level that includes dependents, a drop-down is generated with the dependent type (based on the coverage level selected). Select to create new dependent(s) (Spouse, Children).
_Step_11.png)
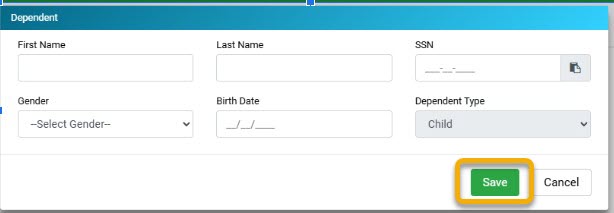
9. A Dependent pop-up screen will appear. Fill in the demographic information in the provided fields, then click Save.
10. If additional plans should be added, select the blue Add Plan hyperlink.
_Step_11.png)
11. Click the green Save button in the lower right-hand corner.
Congratulations! You have successfully entered a dependent for an existing participant/Qualified Beneficiary (QB)!
Steps to Add an existing Dependent as a Qualified Beneficiary (QB).
1. Log in to your account through the Employer Portal.
2. Click the Participants tab on the left-hand side of the screen.
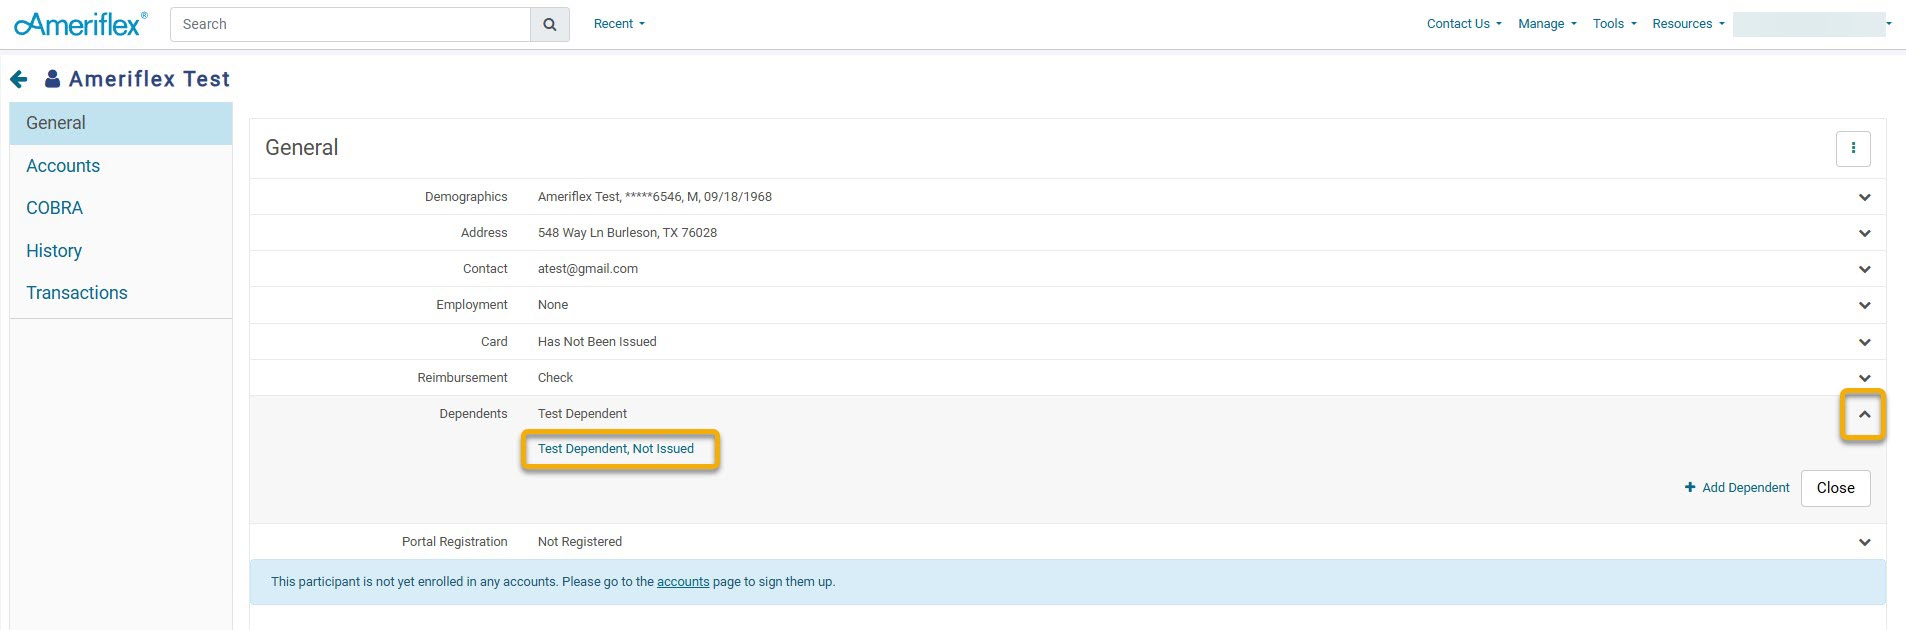
3. Find the desired participant and select their name.
4. Select the Dependents drop-down arrow, then select the name of the desired Dependent.
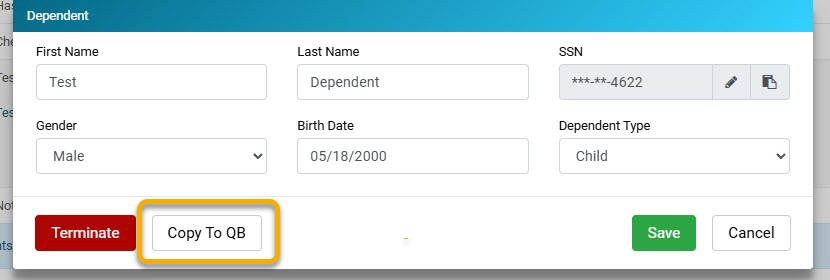
5. On the Dependent pop-up screen, select Copy to QB.
6. On the new QB pop-up screen, select Dependent COBRA QB as the Participant Type, fill out all requested information, then click Save.

7. From the Event Type drop-down menu, choose the correct type from the list of options. Then enter the Event Date of the Life Event. Please note that under Participant Details, you will want to enter the Employees Hire Date, Employee Type, and Payroll Type. Once the information is completed, click Next.
8. Select plans from the Plan drop-down menu. When selecting the plans for which a Qualified Beneficiary (QB) is eligible, ensure you also select the corresponding Coverage Level. The rate will adjust according to the selected coverage level.
9. If additional plans should be added, select the blue Add Plan hyperlink. Once all plans have been added, click Save.
10. On the Send Election Notice pop-up screen, click the green Send button.

You have now added the Dependent as a Qualified Beneficiary!