1. Log into your account through the Employer Portal.
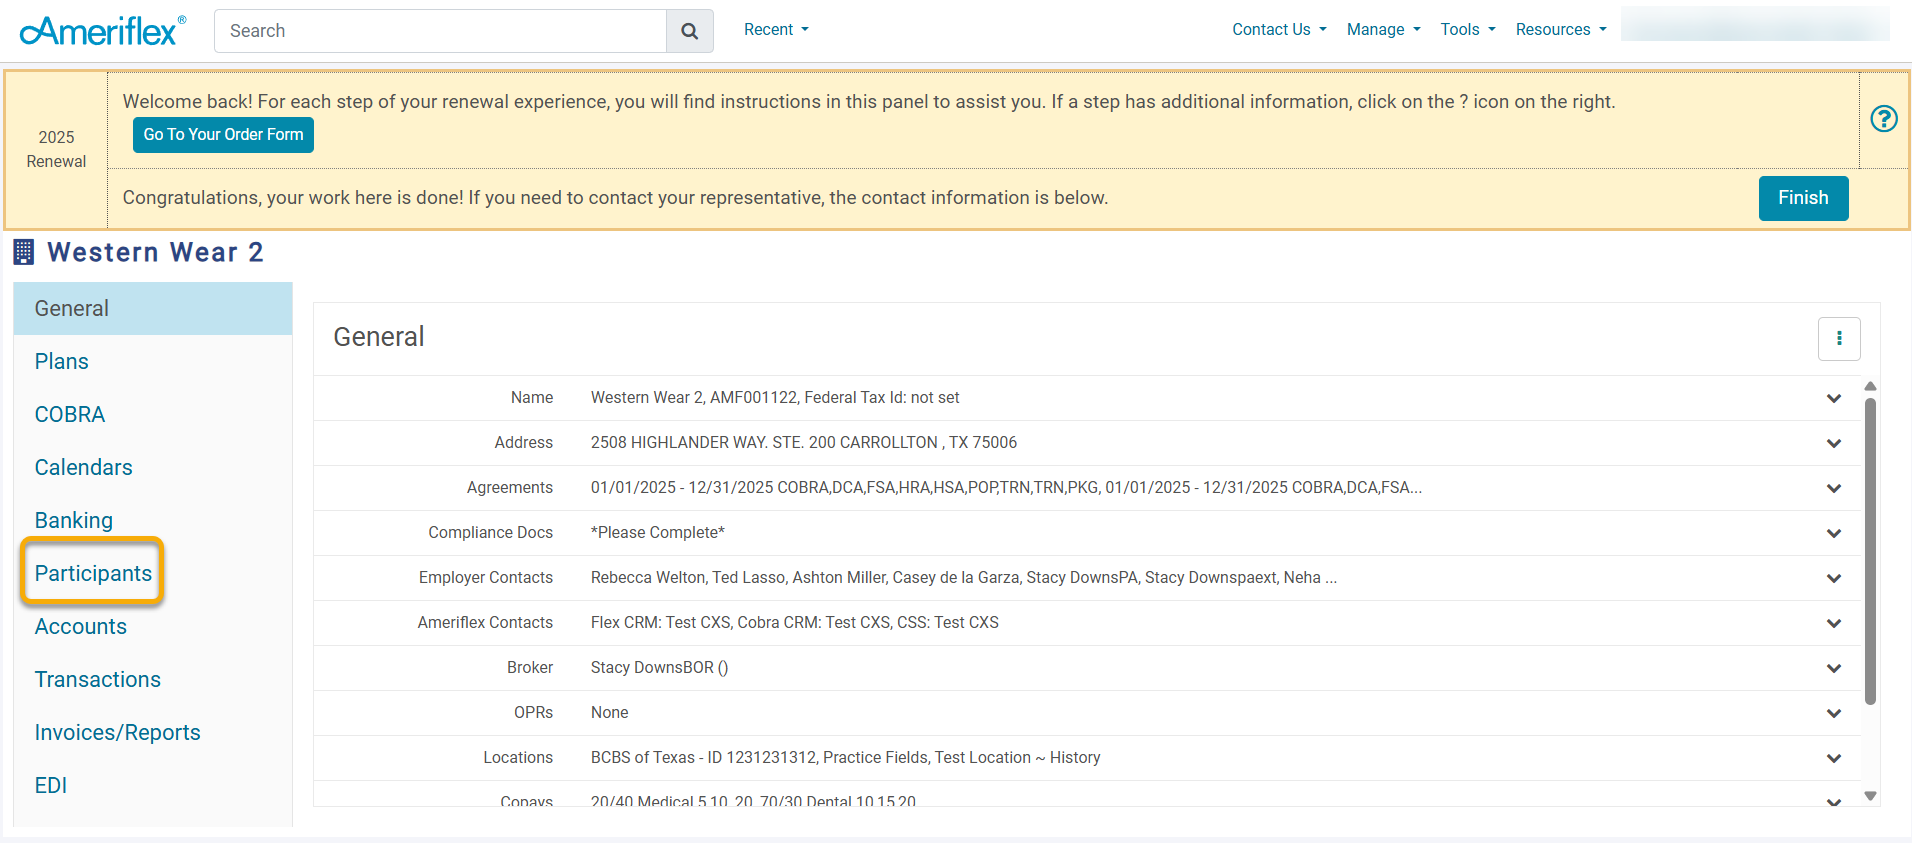
2. Select the Participants tab on the left side of the screen.
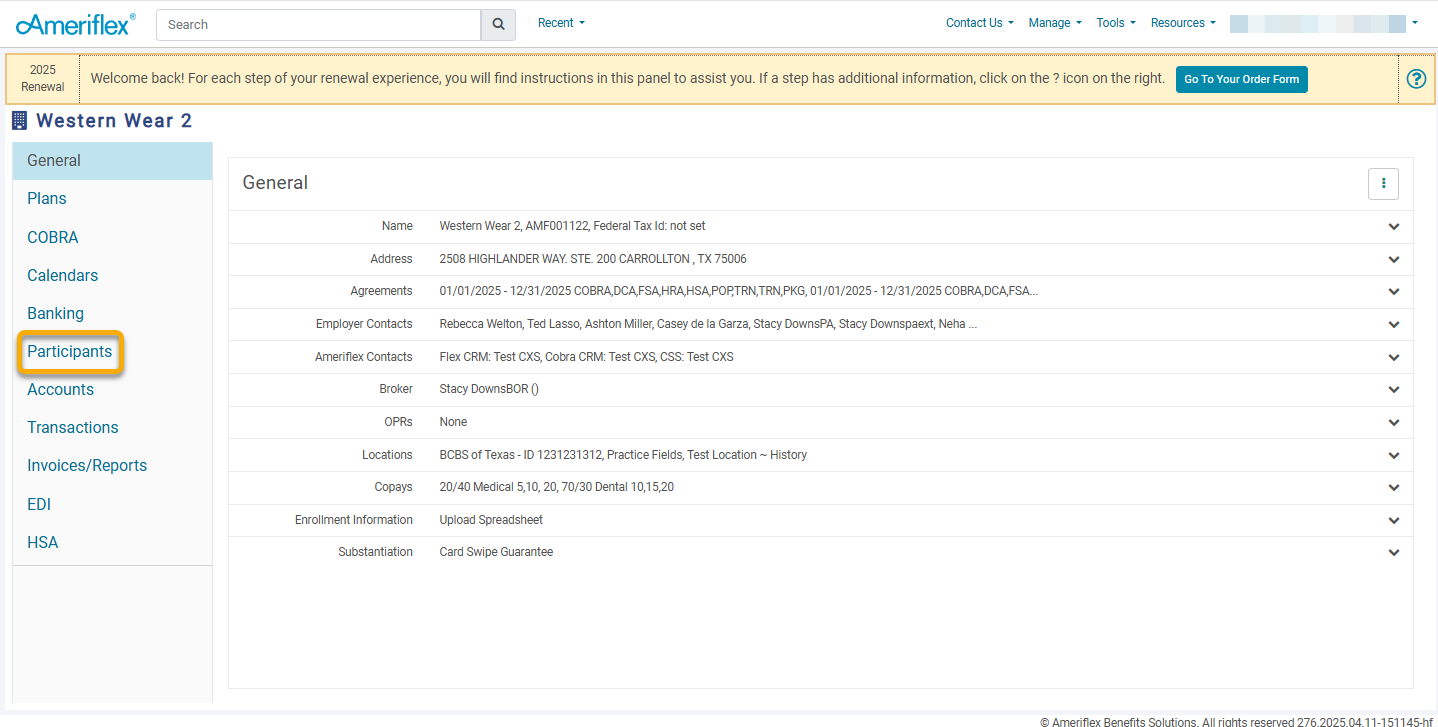
3. Find the participant that you would like to terminate and select their name. If the participant is not already in the system, you will need to add them. For guidance on adding a participant to the system, follow steps 18-20.
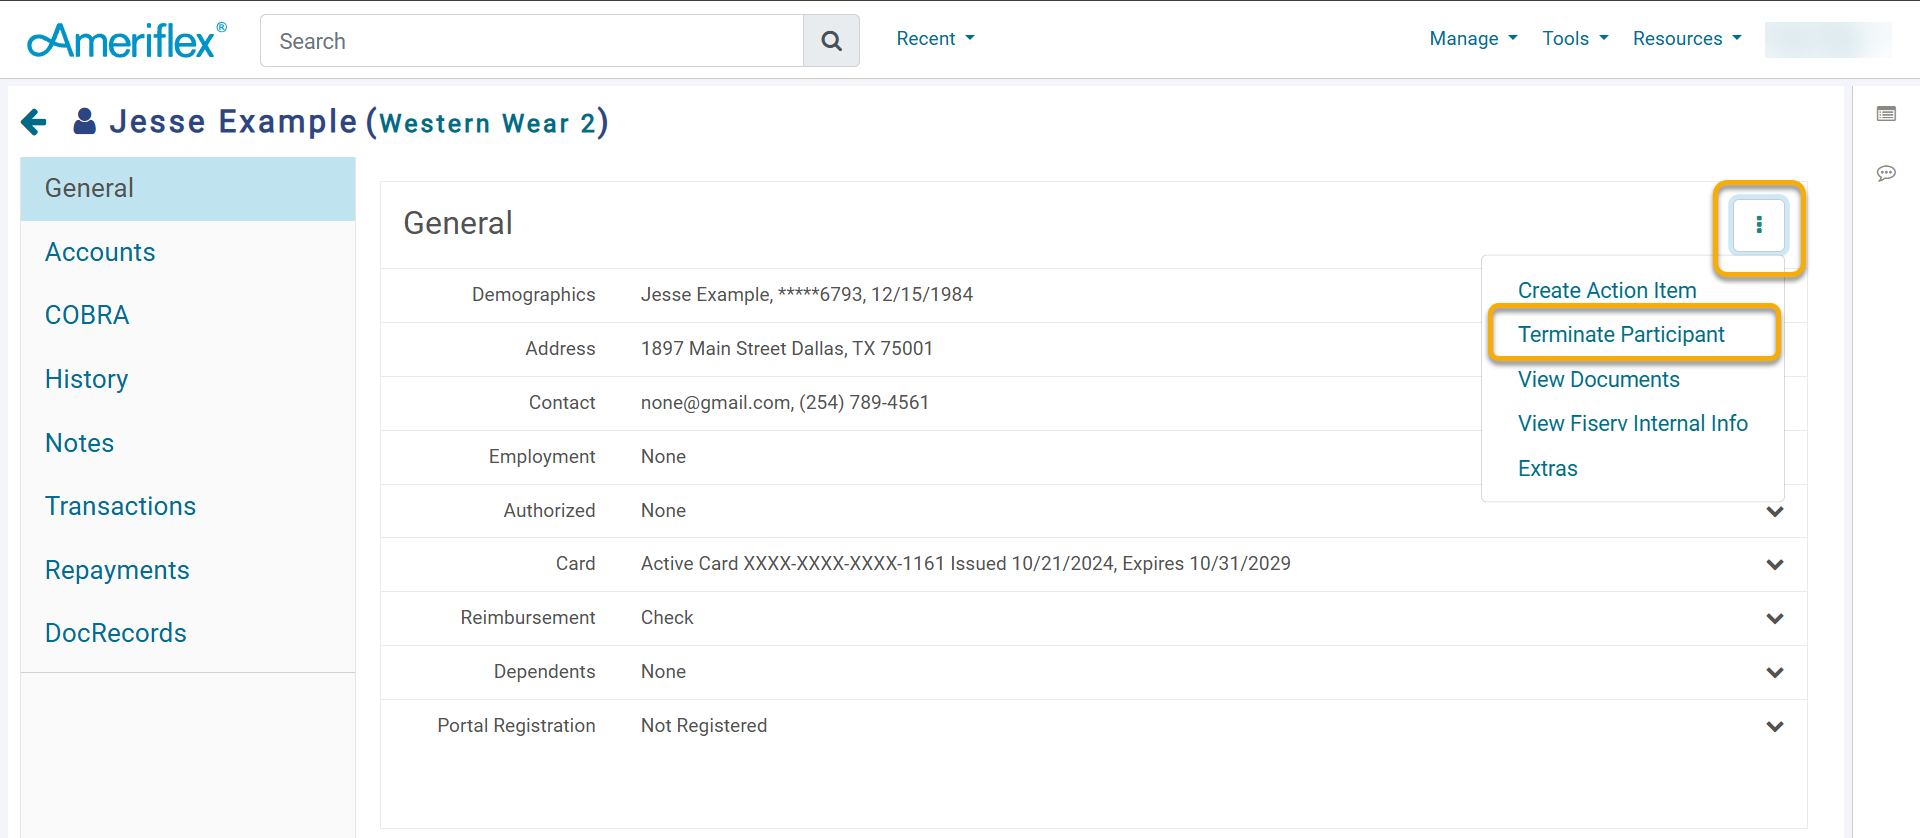
4. To terminate the participant, click the three-dot ellipsis in the right corner and select Terminate Participant from the options.
5. Enter the Terminated Date and additional information as needed. Then click Save.
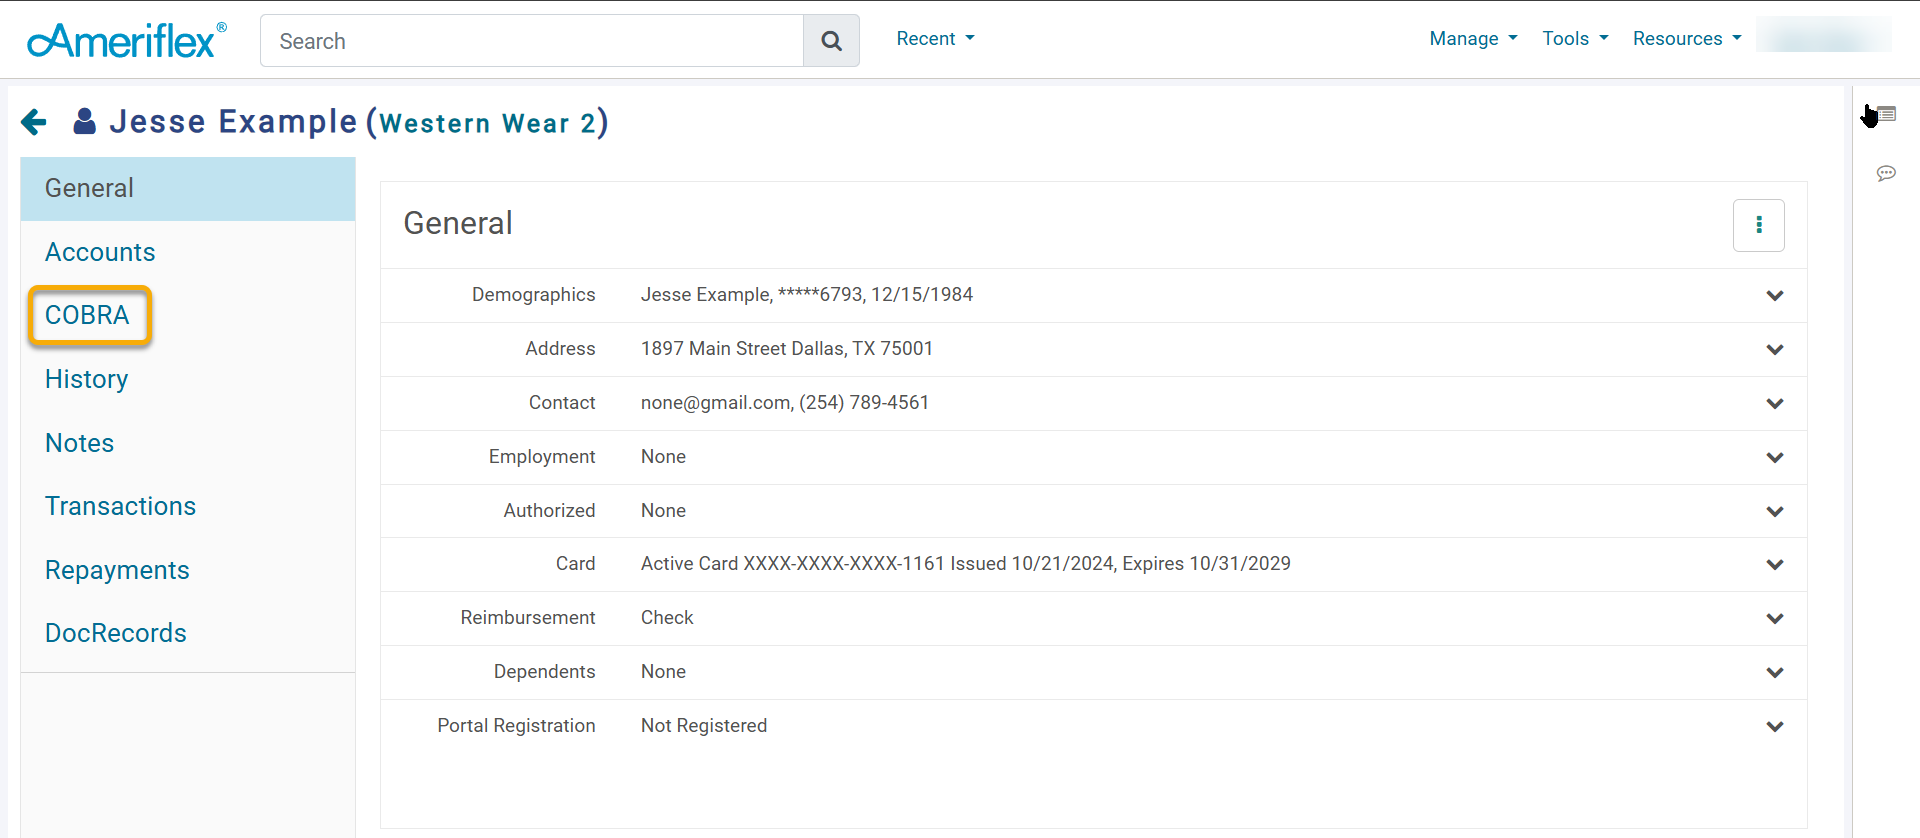
6. Select the COBRA tab located on the left side of the screen while still on the participant's page.
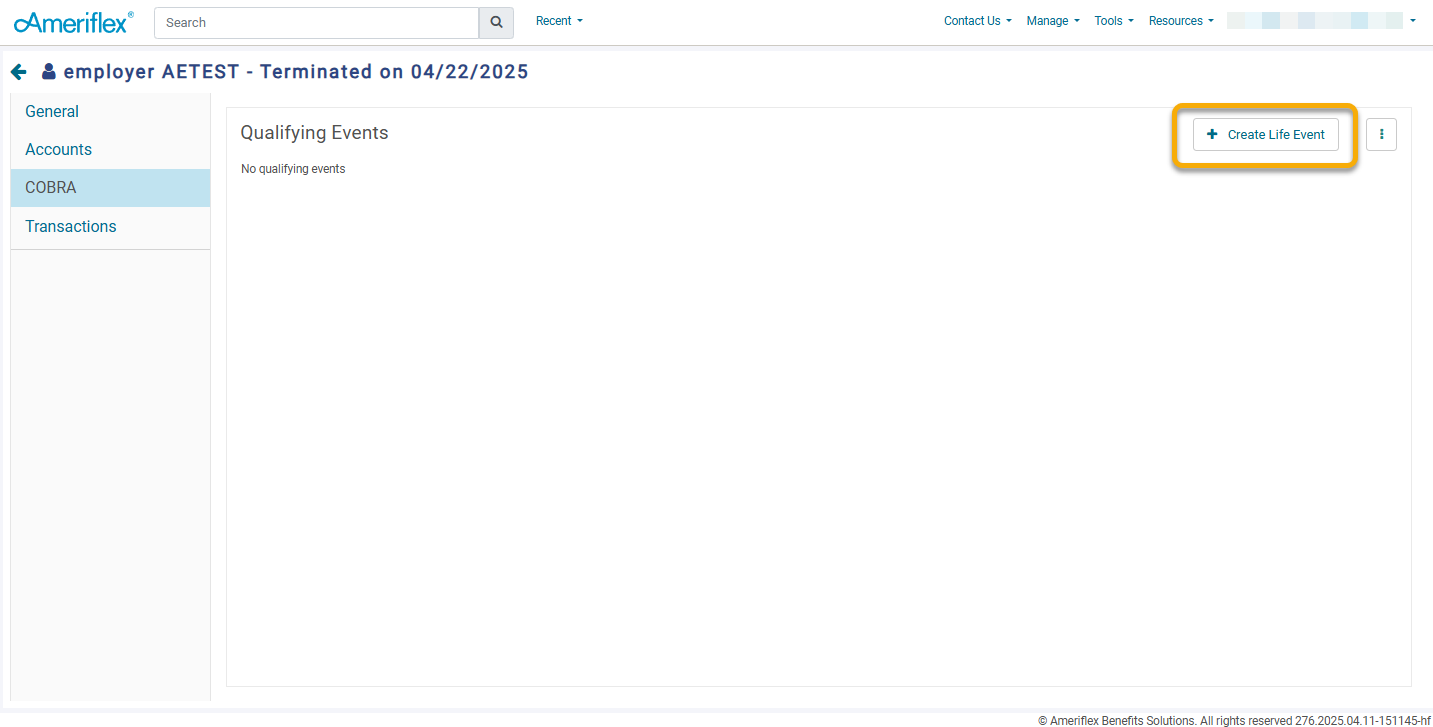
7. Select + Create Life Event located in the upper right hand corner. This will take you to a separate page where you can enter all of the relevant information for the Life Event.
8. Select the Event Type dropdown menu, and choose the correct type from the list of options. Then enter the Event Date of the Life Event.
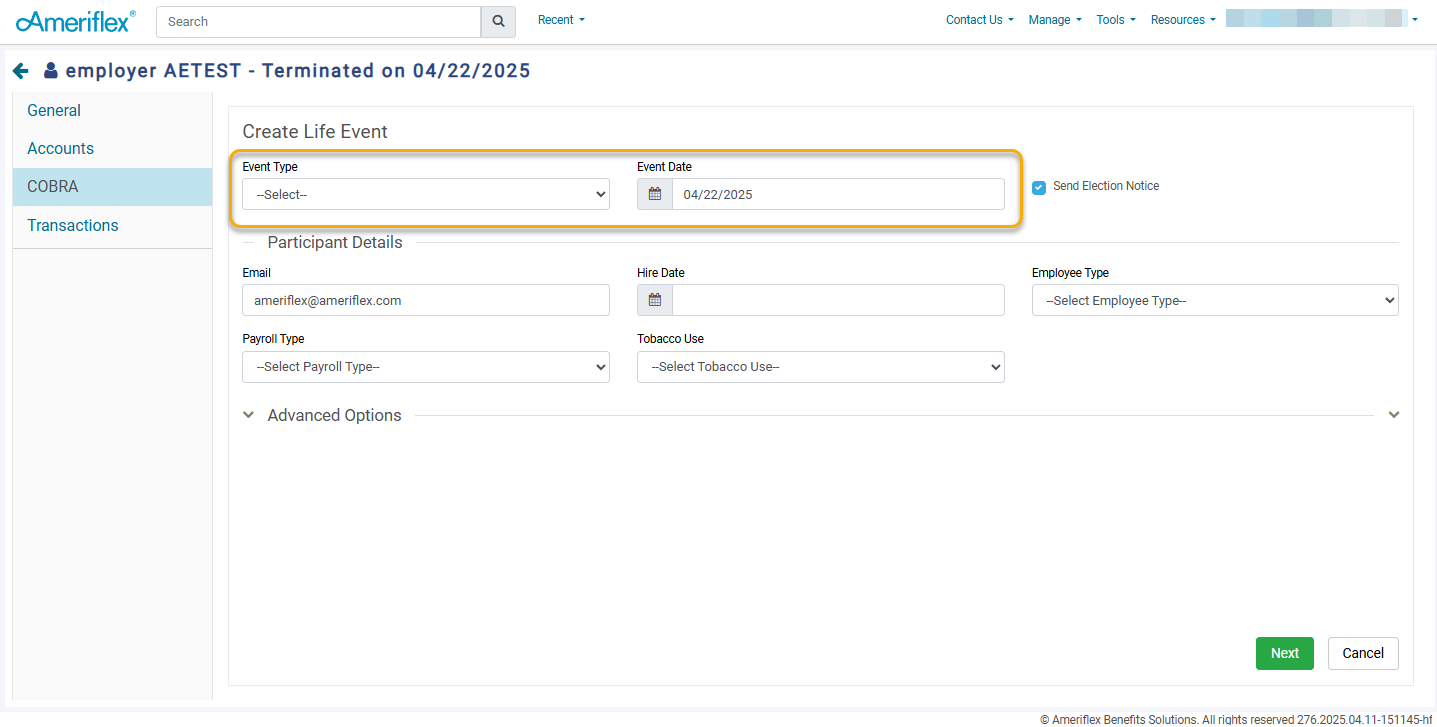
9. Then, complete the Participant Details section, including information such as Hire Date, Employee Type, Payroll Type, and Tobacco Use. When choosing Employee Type, select from Full Time, Part Time, Unknown, and Custom. If Custom is selected, an additional field titled Custom Employee Type will appear, allowing you to type in anything. Once finished, click the green Next button in the bottom right corner.

10. Select Plans using the dropdown. When selecting the plans that a Qualified Beneficiary (QB) is eligible for, ensure you also select the appropriate Coverage Level. Based on the selected coverage level, any dependents will automatically populate in the Dependents section. The corresponding rate will also display next to the Coverage Level. The rate will adjust depending on the coverage level selected.
11. If additional plans should be added, select the blue Add Plan hyperlink.
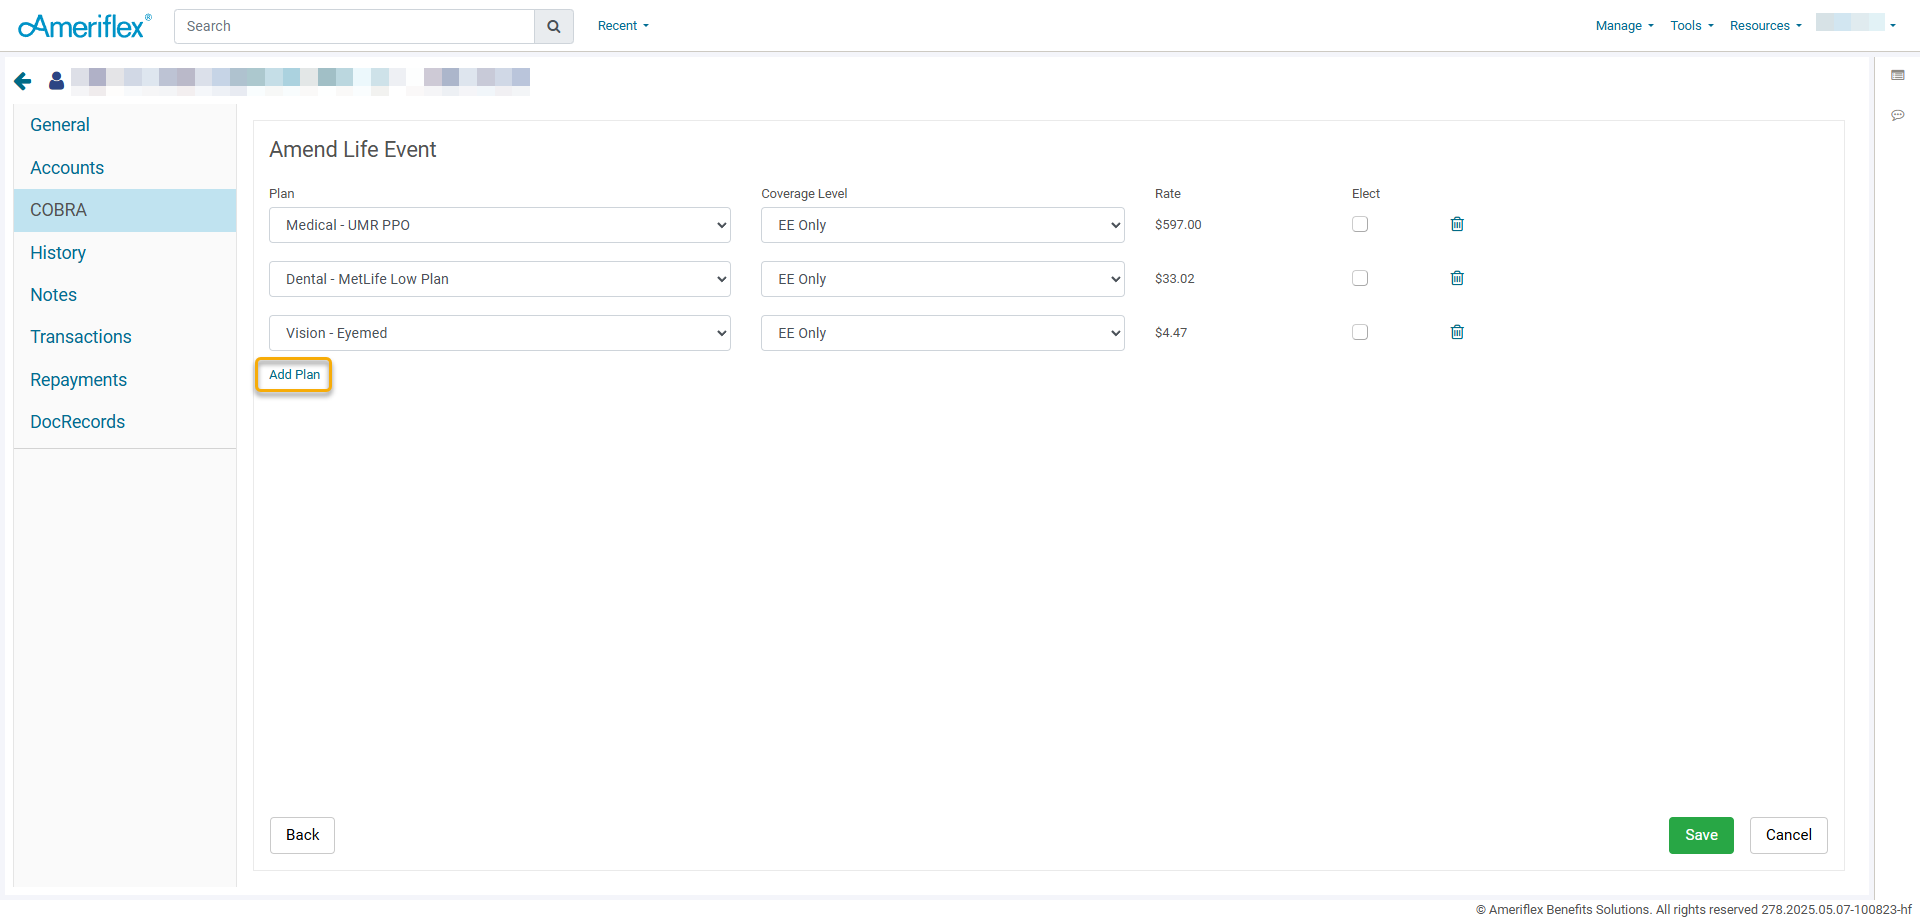
12. Click the green Save button in the lower right-hand corner.
Congratulations! You have successfully entered a Qualified Beneficiary.
13. After clicking Save, you will be returned to the COBRA tab under the participant. Select the three-dot ellipsis in the top-right corner.
14. From the dropdown menu, select Manage Subsidies.
15. Click the Add Subsidies button located in the top-right corner.
16. Choose the Plan Type, Start Date, End Date, and whether you want the subsidy to be a percentage or a flat amount.
17. Click the green Save button.
You have successfully entered a subsidy for a Qualified Beneficiary.
Add a Participant
If a participant is not already in the system and you must add them, complete the following steps:
18. Click the Participants tab on the left-hand side of the screen.
19. Click the +Add Participant button.
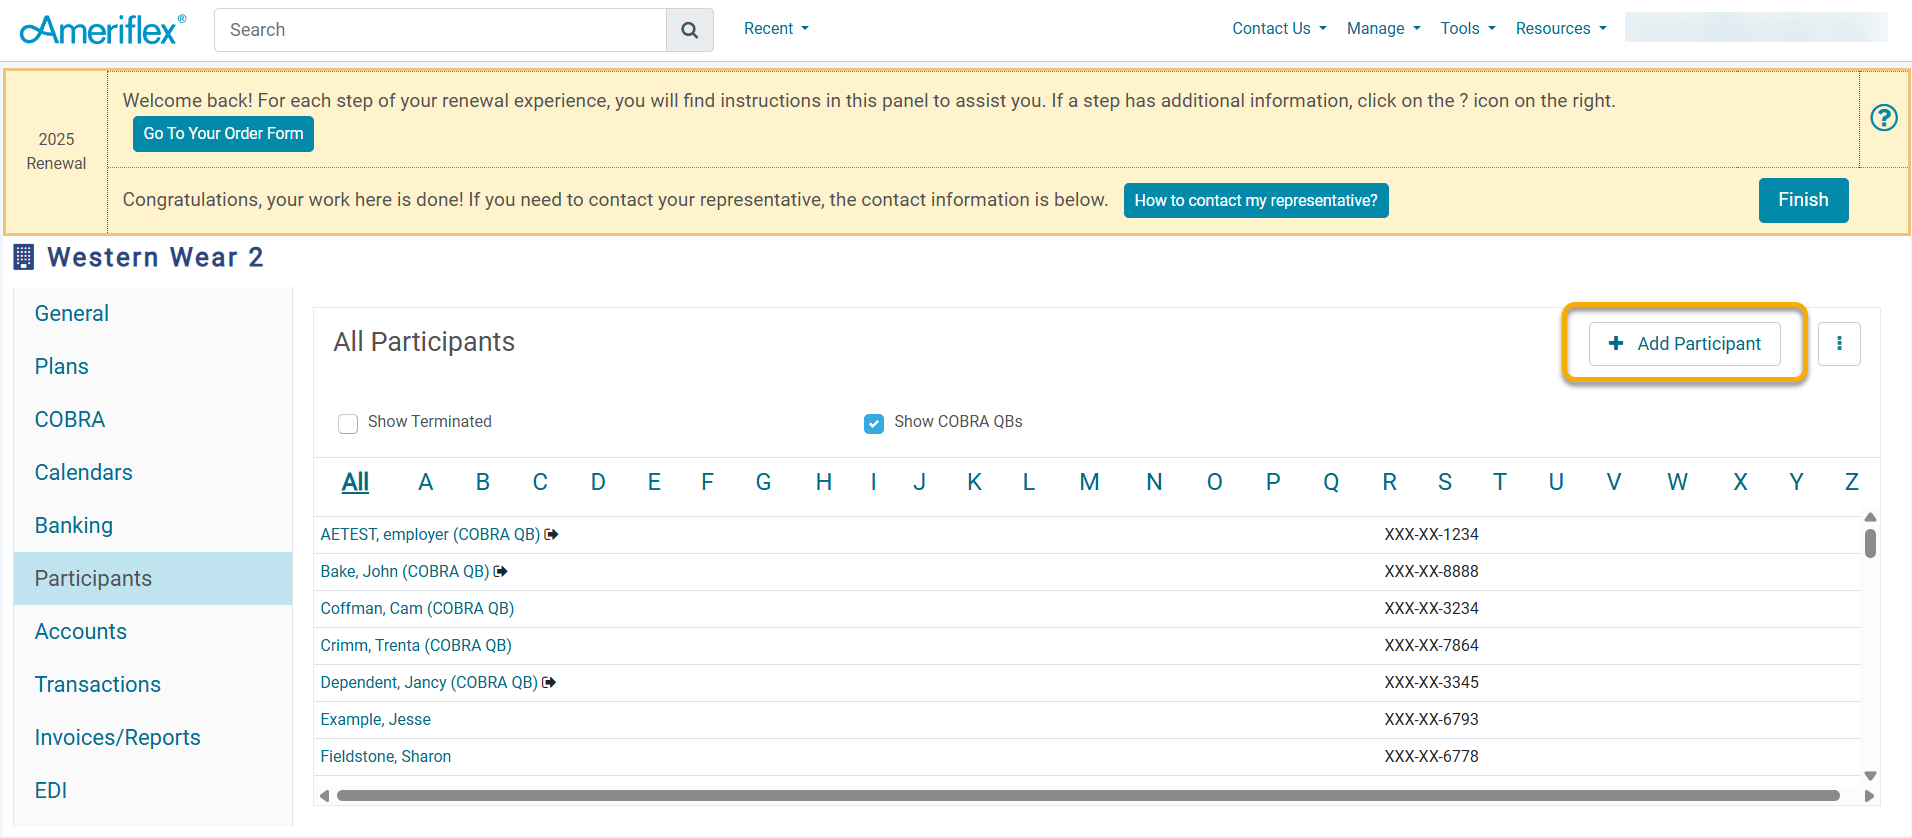
20. On the Create Participant pop-up screen, fill out all requested information, then click Save.

The new participant has been added to the portal!