You can enter qualifying events, including terminations, layoffs, etc. into the Ameriflex COBRA Portal. Adding beneficiaries into the portal on your own helps Ameriflex process the information faster and more accurately. As a result, beneficiaries are able to receive their COBRA notices faster.
Complete the following steps to learn how to add a Qualified Beneficiary:
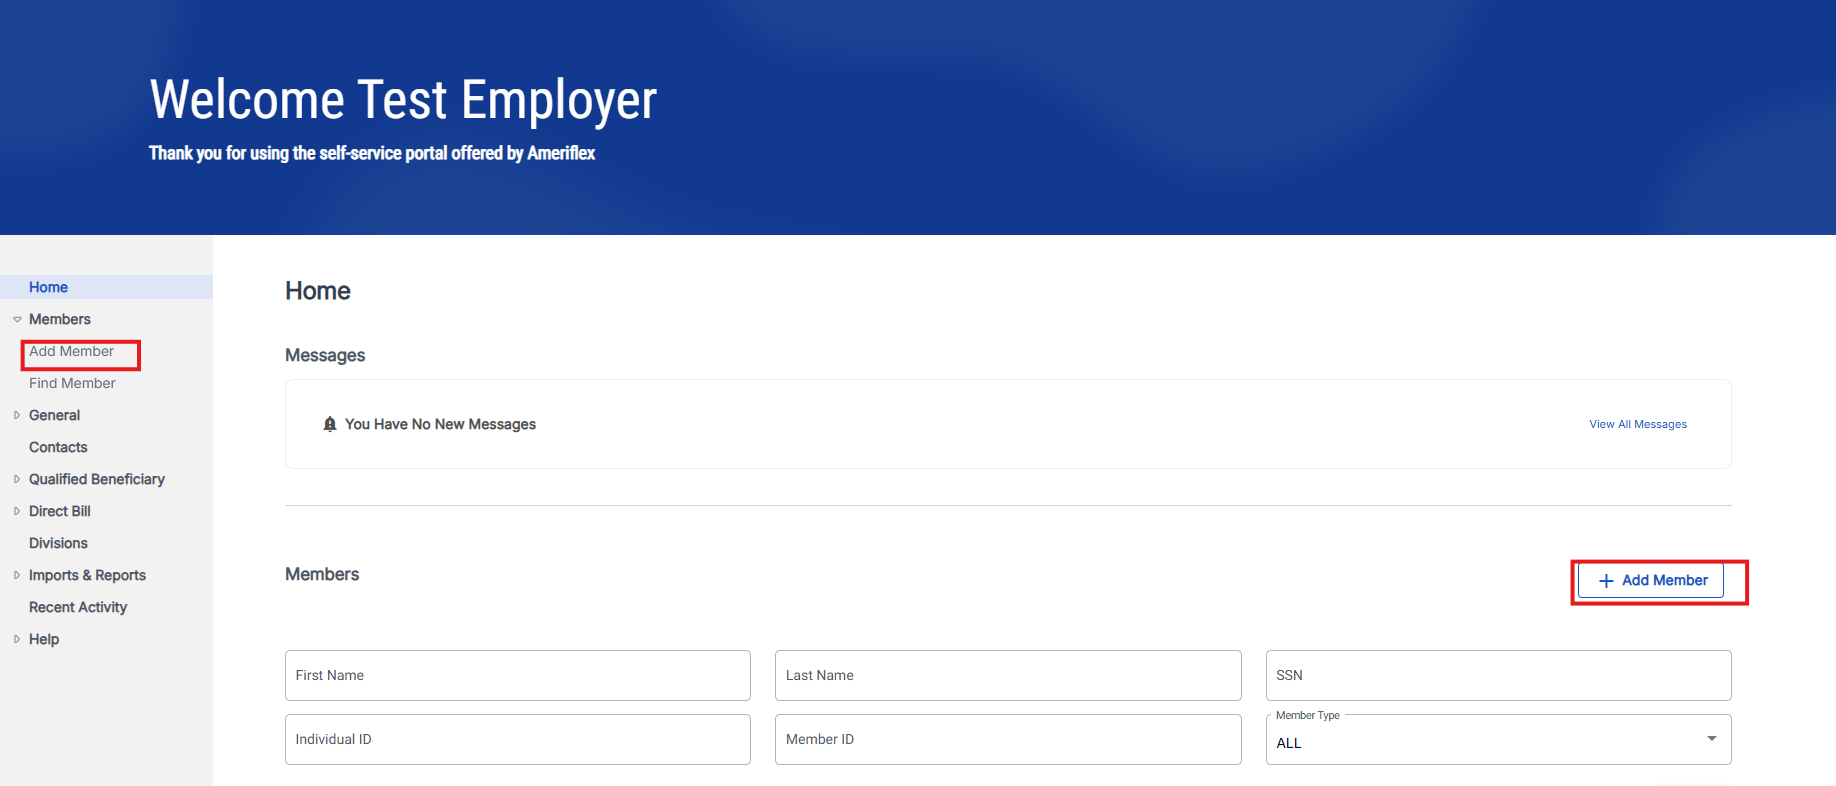
1. Open this link Ameriflex COBRA Portal and click the blue Employer Login button to access your account.
2. There are two ways to add a Qualified Beneficiary directly from the home screen. You can either click the blue +Add Member button on the right-hand side of the screen, or select the Members tab on the left-hand side of the screen then choose Add Member from the dropdown options.
3. On the new Add Member page, locate Qualified Beneficiary (QB) and click Select.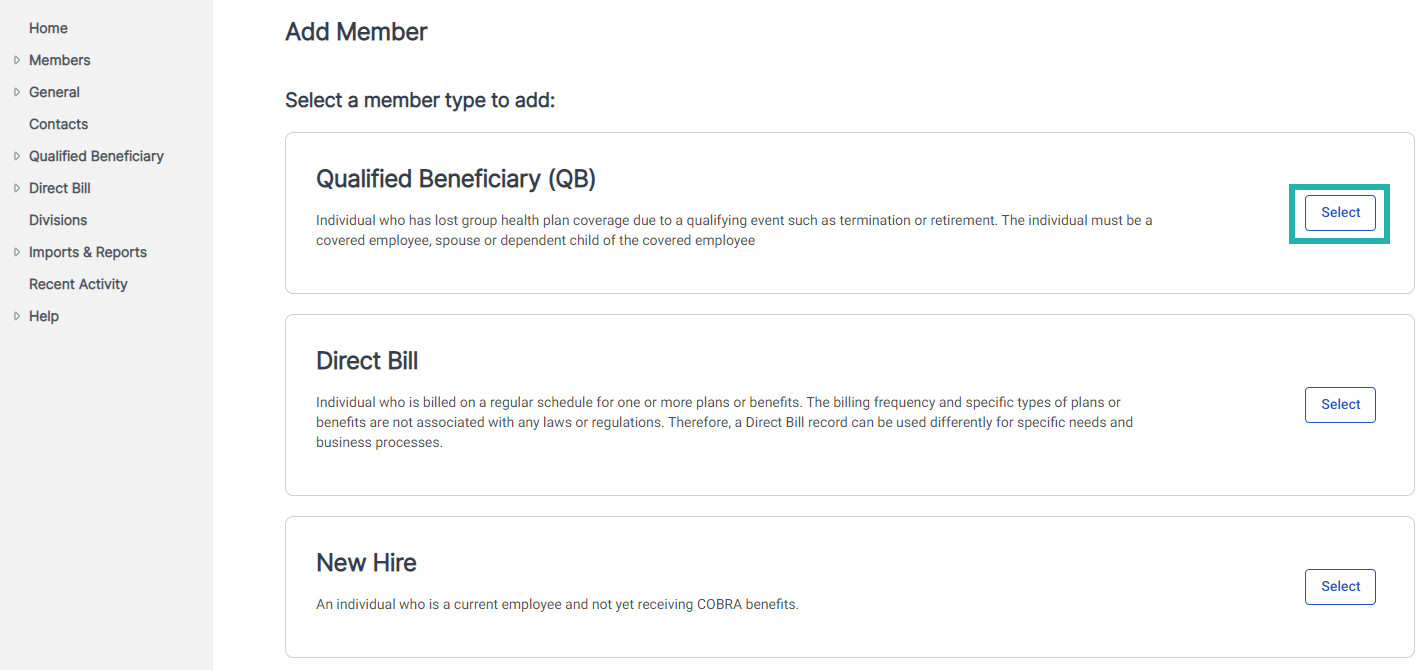
4. On the new Add Qualified Beneficiary Member page, fill in the required fields (marked by a red asterisk) and any other information desired.

5. Click Continue when you're finished filling out this page.
Let us know why we are offering COBRA and/or entering them as a Legacy participant.
6. Fill in the required fields (marked by a red asterisk) and any other information.

Everything that is pre-populated in the required fields on the left will stay as they are.
7. Locate the "Has this member already been offered COBRA?" question and select Yes to indicate you're entering a Legacy participant.

8. Complete the following section of the same page:

- Date Specific Rights Notice was Printed - Choose the date that is on the participant’s COBRA offer letter.
- Has the member elected? Select Yes or No.
- Postmark Date of Election Form - If yes to the previous question, enter the postmark date of the Election Form.
- Next Premium Owed - Select the month and year.
9. Click Continue.
The Plans & Bundles page appears.
10. Click Add Plan. 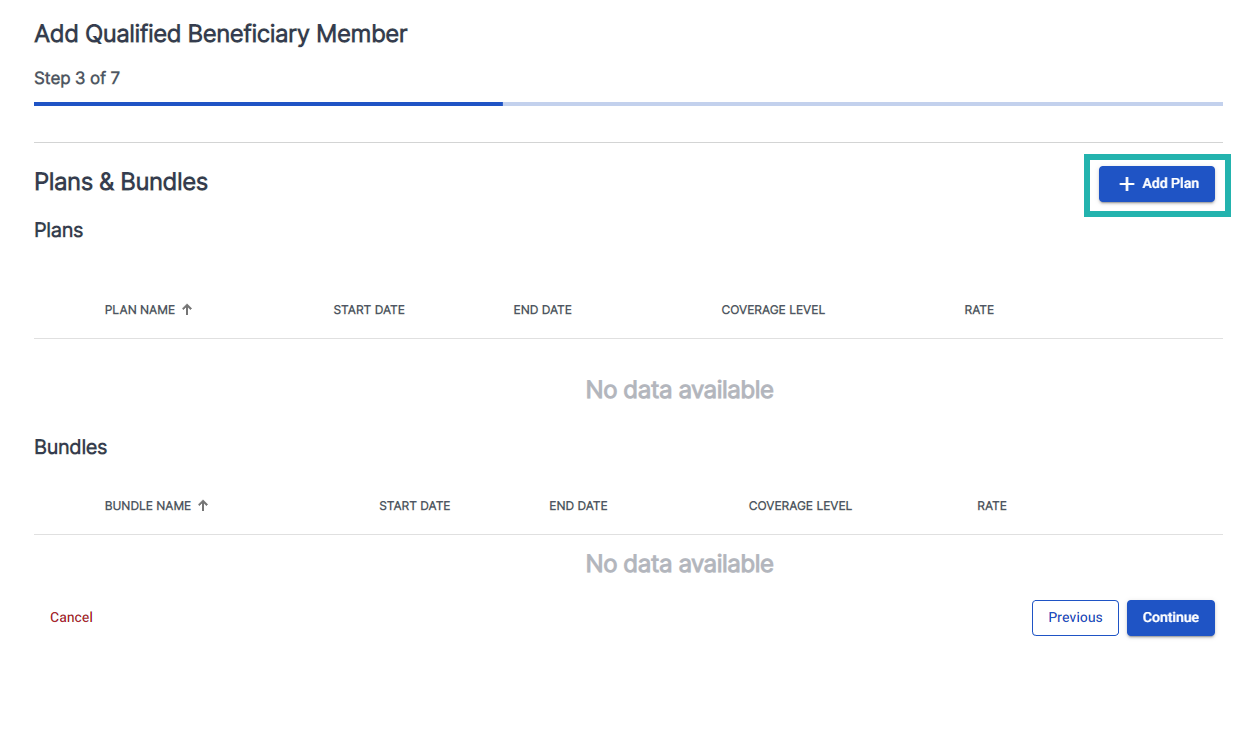
The Add Plan page appears.
11. Locate Plan, click the drop-down arrow, and then select Plans from the list. 
12. Locate Coverage Level, click the drop-down arrow, and then select the correct coverage level from the list. 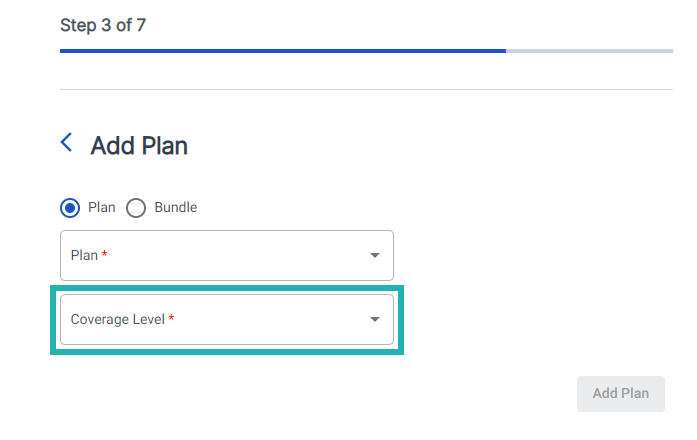
13. Click Add Plan.
14. Repeat steps 9 through 12 if you need to add additional plans.
The Add Plan page closes and the Plans & Bundles page reappears.
15. Click Continue when you're done adding all your plans.
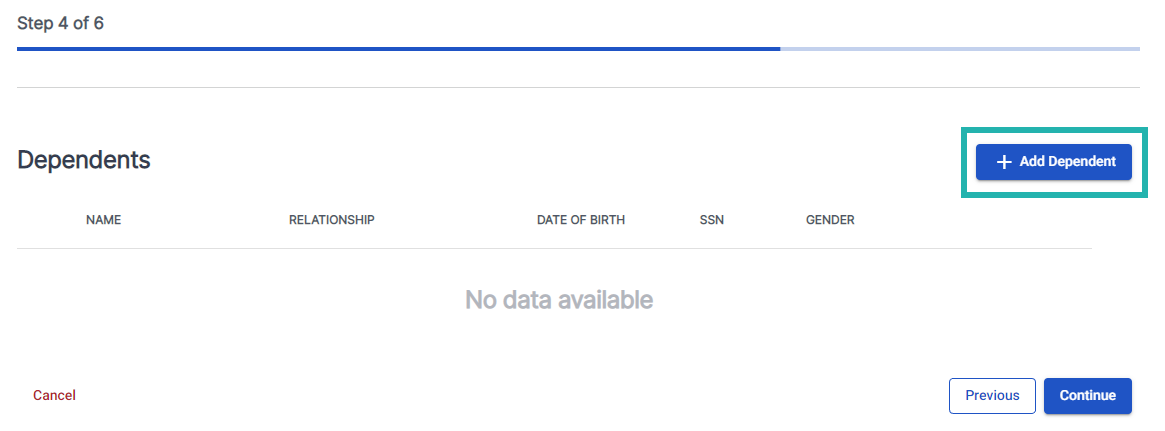
The Dependents pages appears.
16. Click the Add Dependent button to add any dependents to the plan.
The Dependent Information page appears.
17. Fill in the required fields (marked by a red asterisk) and any other information.
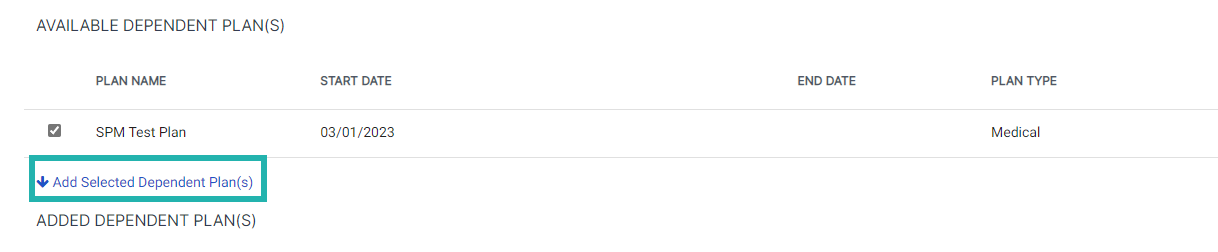
18. Click the down arrow icon + Add Selected Dependent Plan(s).
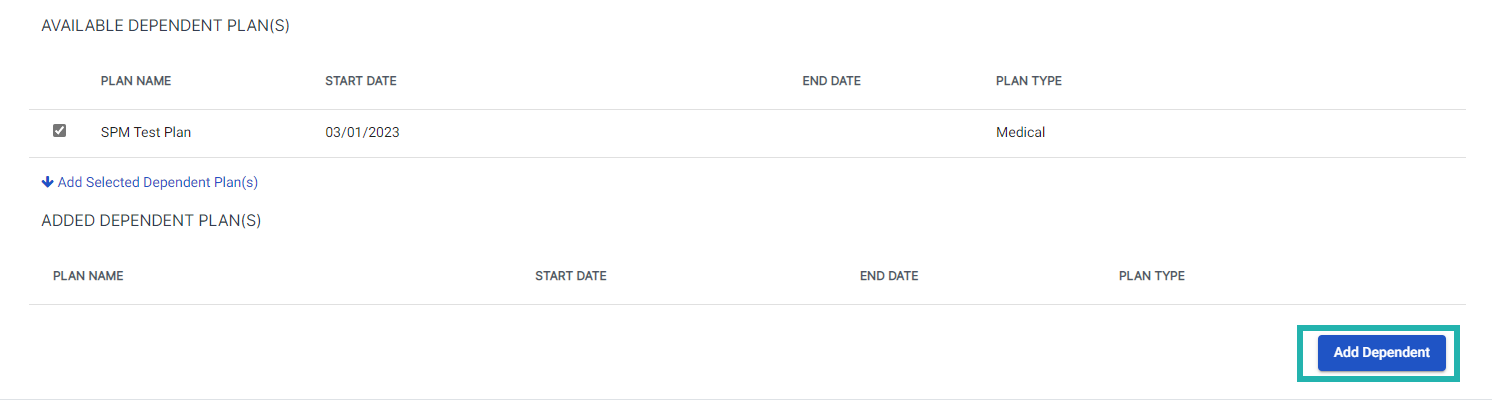
19. Click Add Dependent.
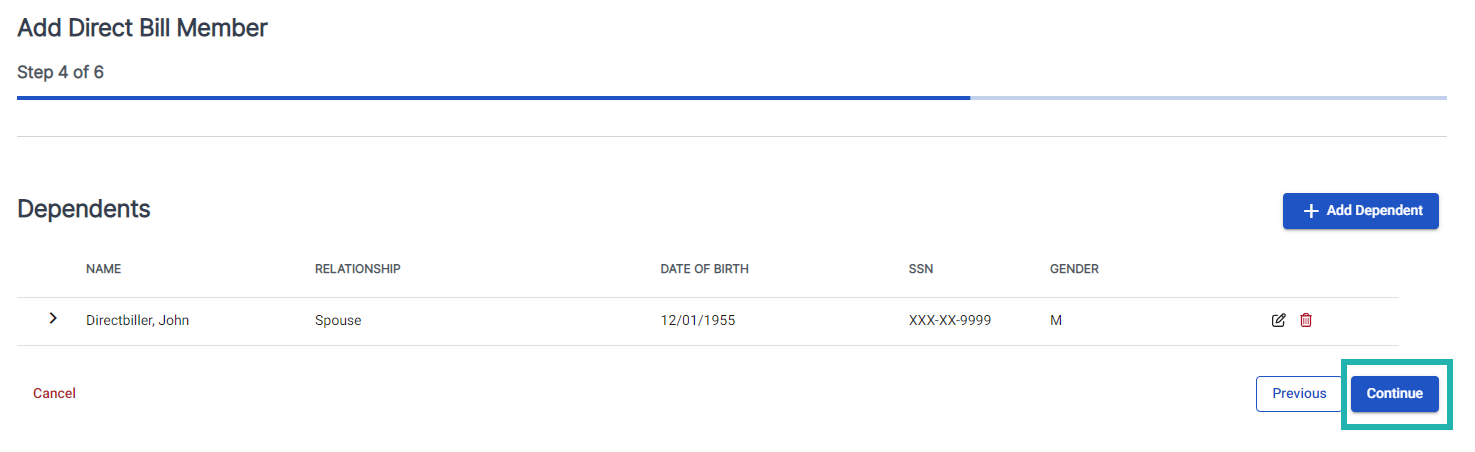
20. Repeat steps 15 through 18 if you need to add additional dependents.
21. Click Continue.
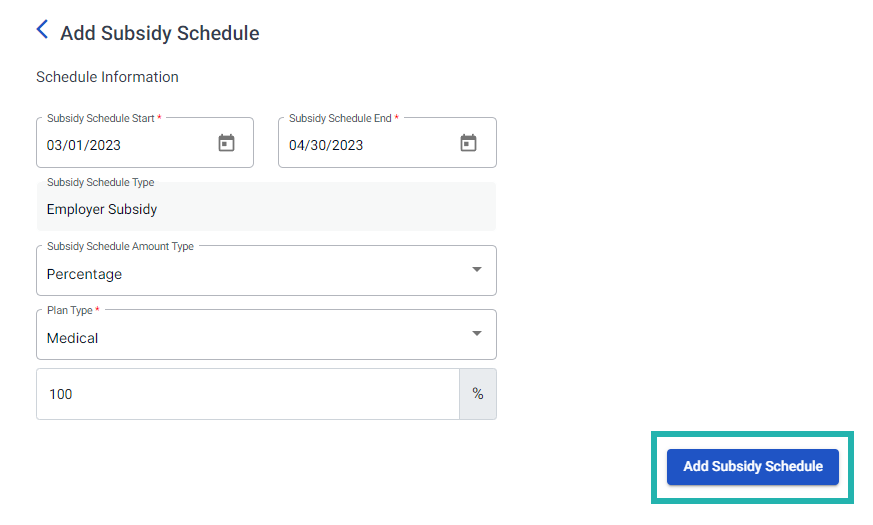
22. Click Add Subsidy Schedule if you want to add a subsidy.
.PNG)
23. Fill in the required fields (marked by a red asterisk) and any other information.
24. Click Add Subsidy Schedule.
25. Repeat steps 20 through 22, as needed.
26. Click Continue.

27. Click Add Member to complete the process.
You successfully added a Legacy Qualified Beneficiary to COBRA.